How to Store Dehydrated Food & Pack Meals for the Trail
This page covers storing dehydrated food at home, and how to vacuum seal meals for backpacking trips.
Having a problem with vacuum seal bags getting punctured by the sharp parts of dried food?
Try the packing technique described in the section on vacuum sealing backpacking meals.
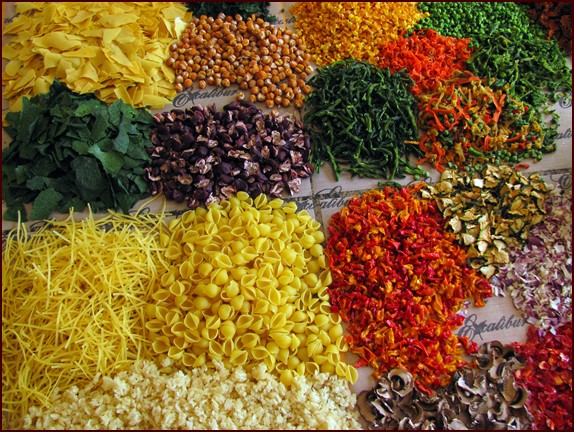
Go ahead and take a photo of your beautifully dried vegetables that will go into your backpacking meals, but don’t let them sit out in the open too long. Oxygen and moisture are the enemies of dehydrated food.
Backpacking Food Storage Topics on this Page:
How to Store Dehydrated Food with Oxygen Absorbers
Using Oxygen Absorbers for Dehydrated Food Storage
As food comes out of the dehydrator, weigh it or measure it by volume. That way you can decide if you have dried enough of each food. Once the dried food has cooled, place it in a jar with a tight fitting lid. Jars are more economical than disposable vacuum seal bags for home storage, and there’s no plastic waste. For short-term storage of a month or two, there won’t be much negative impact on dried food if stored in jars without oxygen absorbers. For long term storage in jars, use oxygen absorbers.
Oxygen absorbers do a fine job of gobbling up oxygen, and they only cost a few pennies each. With oxygen absorbers, you can reuse jelly, sauce, and pickle jars. Clean and dry the jars and lids thoroughly before repurposing them for dehydrated food storage.
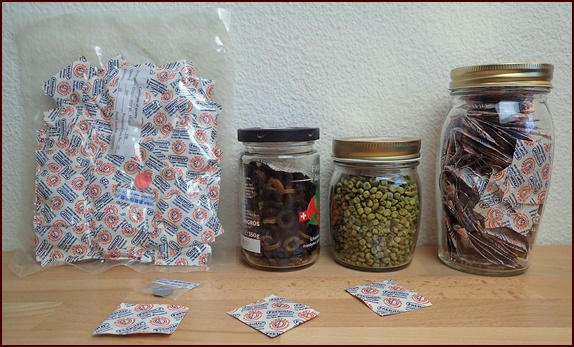
Photo: (left to right) 100 oxygen absorbers as they arrived in a sealed bag, dried olives and peas in small jars, and oxygen absorbers stored in a jar after the package was opened.
Use the smallest jar that will hold the dried food. There will be less oxygen to remove if the jar is filled all the way.
Use a 50-cc absorber for half-pint jars, 100 cc for pint jars, and 300 cc for quart jars. You may want to use the 100-cc size oxygen absorbers for all jars; use 2 or 3 of them for large jars.
Once you open a package of oxygen absorbers, take out what you need for immediate use, and transfer the rest to a glass jar.
Exposure to light impacts the quality of dried food over time. Store jars in a dark place. A chest of drawers blocks light and makes accessing the jars easy. Label the lid of the jar with the name of the food and the date dried.
Oxygen-absorber suppliers usually sell Mylar food storage bags, which can be used together with oxygen absorbers. Mylar bags are an option for storing dehydrated food. You don’t need a vacuum sealer if you pack meals in Mylar bags. You can seal them with an iron. One advantage of using Mylar bags with oxygen absorbers is that the bags don’t scrunch up around the sharp edges of dried food, which sometimes causes vacuum sealed bags to fail.
See Heat Sealing Mylar Bags. This is the website of PackFresh USA. They also sell oxygen absorbers.
Mason Jar Vacuum Sealing Accessory
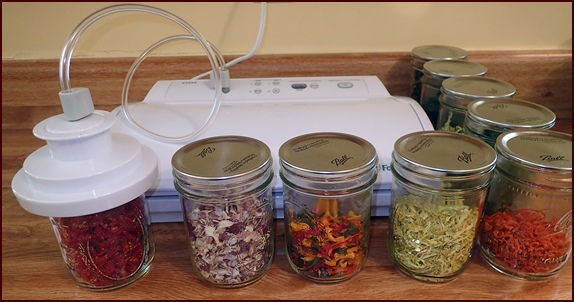
Photo: Storing dehydrated vegetables using a wide-mouth jar sealing accessory.
If you own a FoodSaver vacuum sealer, you can vacuum the air out of canning jars with a jar sealing accessory. The accessory only works with vacuum sealers that have a tube port. The kit comes with a connecting tube and two attachments you place over either wide-mouth or regular-mouth canning jars.
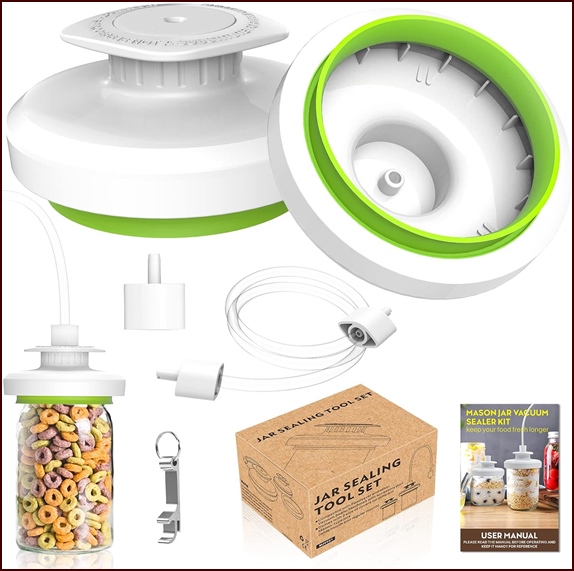
FoodSaver no longer makes the jar sealing accessory, but another manufacturer has filled the void. Purchase the jar sealing accessory for FoodSaver vacuum sealers (shown above) on Amazon. (Affiliate link)
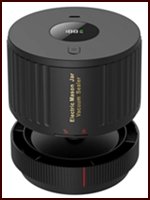
Electric Jar Vacuum Sealer
New: Electric jar vacuum sealer for wide-mouth and regular-mouth mason jars does not require connection to a Food Saver Vacuum Sealer.
(Amazon affiliate link)
Backpacking Food Storage of Meat
As long as the meat you dry is low-fat, it will keep well in jars with oxygen absorbers or in jars that are vacuum sealed with the FoodSaver accessory. I have stored dehydrated meat for up to a year in jars. If you want to go longer than a year, or if you just want peace of mind, you can vacuum seal the dried meat in vacuum bags, and place the meat in the freezer. When taking dried food out of the freezer, allow the food to return to room temperature before opening the bag. Otherwise, condensation may form on the food.
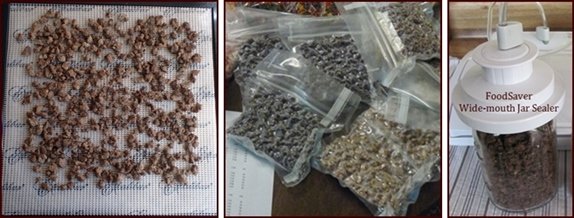
Photo: Dehydrated ground beef and chicken. Allow it to cool before vacuum sealing it in bags or jars. Use oxygen absorbers with jars if you don’t have the jar sealing accessory.
Packing Dehydrated Meals and Snacks
Meals fit in sandwich-size bags, but for larger servings, quart-size bags work best. Quart-size bags are usually thicker than sandwich bags, so they will also do a better job of keeping sharp dried food from poking through them. Snack-size bags, besides holding single servings of snacks, can be cut down in size to hold powdered ingredients like milk and cheese powders. Cut the snack bag in two places two inches from each side. Reseal the cut sides with tape.
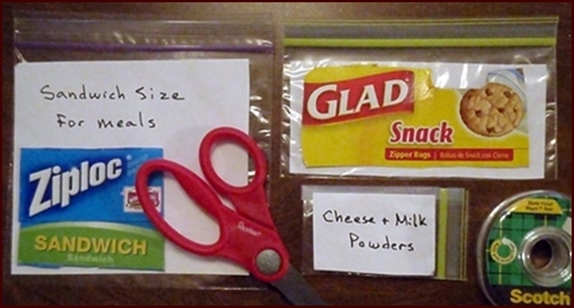
Ziploc and Glad brands are good quality bags to pack meals and snacks in. Wal-Mart Great Value brand plastic bags are thin and puncture easily.
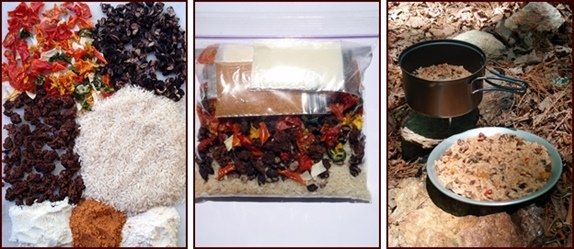
The photo above shows the ingredients for Mexican Beef & Rice packed in a sandwich-size bag with the powdered taco seasoning and milk/cheese powders enclosed in smaller bags. The powdered ingredients are packed separately because they are added to the meal after the meal boils for a minute.
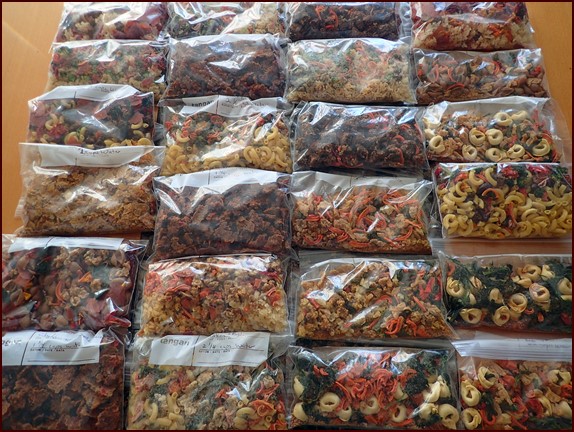
The photo above shows large-portion dehydrated meals assembled in quart-size bags, ready to be vacuum-sealed for transport or storage.
If heading out for only a few days and not doing resupplies, packing daily rations in gallon-size Ziploc bags is sufficient for most conditions and will keep you organized. Long distance backpackers and canoe campers will benefit from vacuum sealing food.
Compostable Bags for Packing Backpacking Food
Looking to reduce your use of plastics?
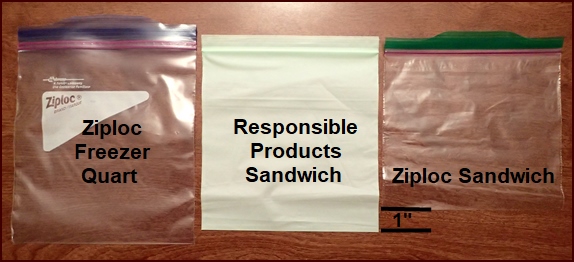
Quart, sandwich, and snack-sized bags from Responsible Products are durable enough to pack your backpacking meals and snacks in. You can reuse them several times, and then turn them into your compost pile. They are made of 100% plant materials and will break down over time when exposed to oxygen, moisture, and bacteria.
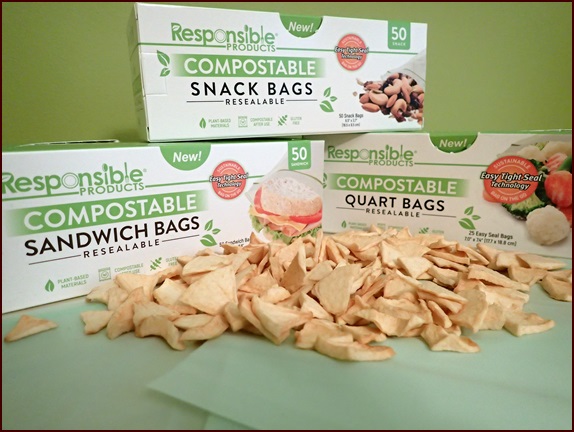
I tested these Responsible Products bags for puncture resistance by putting dehydrated bowtie pasta in the bags and banging on the bags. As expected, the sharp pasta made a few pinholes in the bags. I also tested Ziploc sandwich bags, which also developed puncture holes. I conclude that they are as suitable as plastic bags for packing backpacking meals in, since you’re not likely to bang on your meals like I did. Quart-size Ziploc freezer bags are made of thicker plastic and are more puncture resistant.
The Responsible Products bags are easy to close with a good seal, and the closures continue to work well after several uses.
These compostable bags are water resistent, but they are NOT suitable for freezer-bag cooking where boiled water is added to ingredients in the bag.
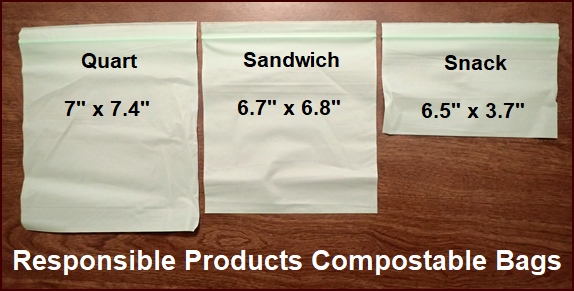
Responsible Products sandwich-size bags are an inch longer than Ziploc sandwich-size bags, so they work well for large portion backpacking meals. The RP snack-size bags are half an inch longer than the Ziploc brand. The quart-sizes are the same for both brands. If possible, pack meals in the sandwich-size compostable bags, as they cost about two cents per bag compared to four cents per bag.
Purchase these compostable bags directly from the manufacturer:
Responsible Products Compostable Bags
Disclosure: As a Responsible Products Affiliate, Backpacking Chef may earn a commission from qualifying purchases. Thank you.
Vacuum Sealing Backpacking Meals
Benefits of Vacuum Sealing Dehydrated Meals
- Protects food from moisture which could cause mold growth.
- Preserves the nutritional quality and appearance of dried food by removing oxygen. Prevents any oil or fat from going rancid, although you should still stick with minimal fat and oil in meals.
- Seals in food odors, a benefit in bear habitat.
- Slows down chewing mice that like a good romp through your food bag in the night.
- Compresses food so it takes up less space.
- Keeps daily rations easily accessible and the remaining days undisturbed.
- Keeps food safe if mailed ahead to places along the trail where you will pick it up weeks or months later.
How to Vacuum Seal Dehydrated Meals
Are your vacuum sealed bags getting punctured by sharp dried food?
The following method of wrapping each meal in a paper towel reduces the number of vacuum bag seals that fail down to about ten percent. If a seal fails, you will know it within 24 hours, and you can see that the contents of the bag are no longer scrunched up.
Pack meals in quart-sized freezer bags. Before filling the bags, write the name of the recipe, the amount of water needed for cooking, and the date packed on the outside of each bag.
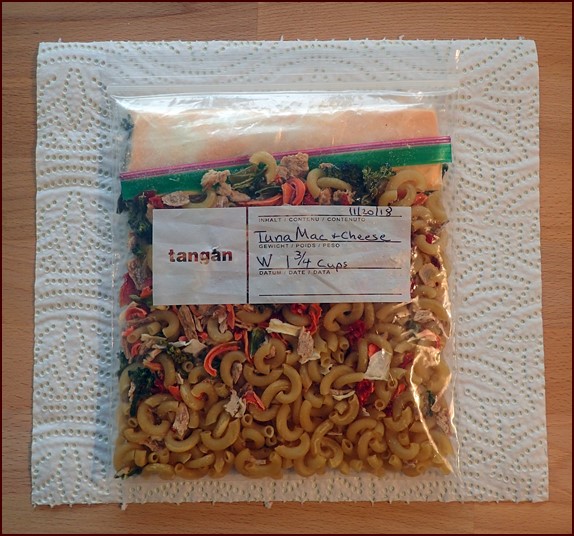
Place each filled bag on top of a paper towel. Flatten out the ingredients to fill the bag completely and evenly. By positioning any bags of powdered ingredients across the top, with no food above or below, you won’t create any bulges.
Fold bag and paper towel in half. Then, pull up the sides of the paper towel, and apply tape to attach. Apply 3 more pieces of tape to the longer open side. Write the name of each meal on the outside of the paper towel.

Two meals fit nicely in an 8-inch wide vacuum seal bag, cut to 11 inches in length.
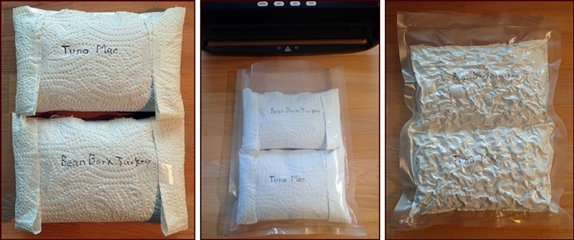
Buy 8-inch-wide rolls, and save money compared to buying individual vacuum seal bags.
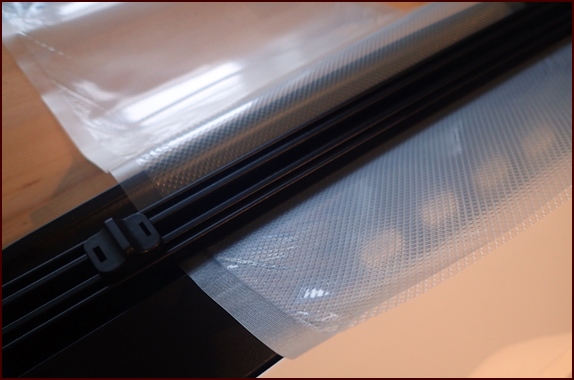
If shopping for a vacuum sealer, go with one that has a built-in sliding bag cutter, as shown below.
Vacuum Sealing Steps
- Cut each bag to length (11 inches long is usually sufficient for 2 meals).
- Seal one end. Double-seal to improve results.
- Insert meals wrapped in paper towels.
- Seal other end.
- Write the date on the bag, so you know to use it before other meals dried later.
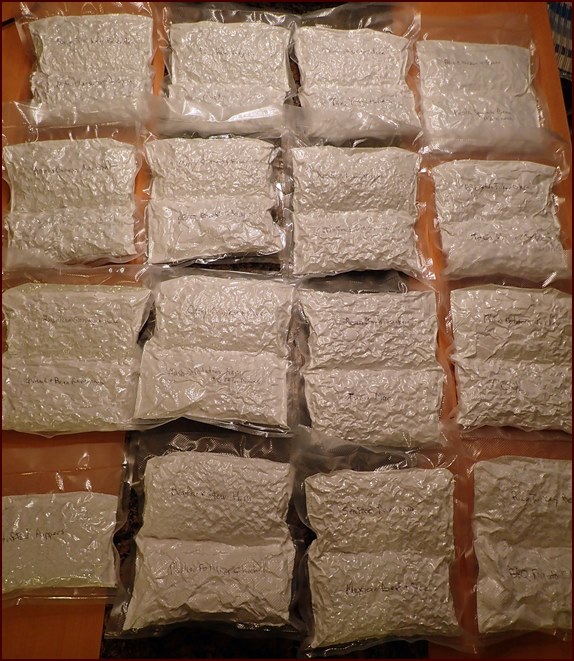
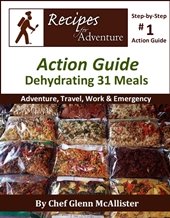
Photo: An emergency supply of vacuum-sealed dehydrated meals as featured in The Action Guide: Dehydrating 31 Meals.
This method of storing dehydrated meals is also ideal for emergency home storage. If an emergency strikes, and you have to leave your home, you won’t have time to fiddle around with assembling meals from a stash of dried ingredients stored in jars. Be ready to go with a supply of ready-to-eat meals.
Vacuum Sealing Daily Rations
If you’re a solo hiker and your meal portions are not large, you may be able to vacuum seal all the food for a day on the trail in a single vacuum seal bag. This is a great way to stay organized.
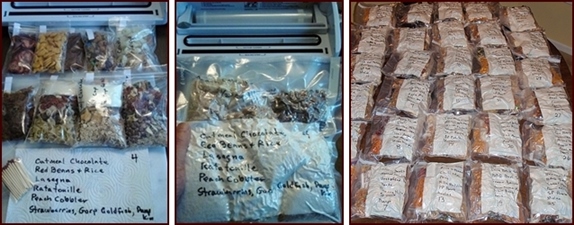
Leave the inner bags unsealed. Put a small slip of paper between the seals of the bags to keep them from sealing all the way. When you vacuum seal the outer bag, the air will get squeezed out of the bags inside. Exception: Close the 2 x 3 bags containing powders since the powders will have displaced the air already and you don’t want any powder to get sucked into your vacuum sealer.
Cut continuous eleven-inch wide rolls twelve inches long, or longer if needed.
Seal one end of the bag. You can seal it twice to improve the odds that the seal will hold.
Fill the bag with your food for the day.
Enclose a paper towel with your menu written on it. Enclosing a second paper towel below the food can help reduce the chance of sharp dried food piercing the delicate lining of the vacuum seal bags. The paper towels come in handy for clean-up and for toilet paper.
Each day’s rations weigh about a pound and a half.
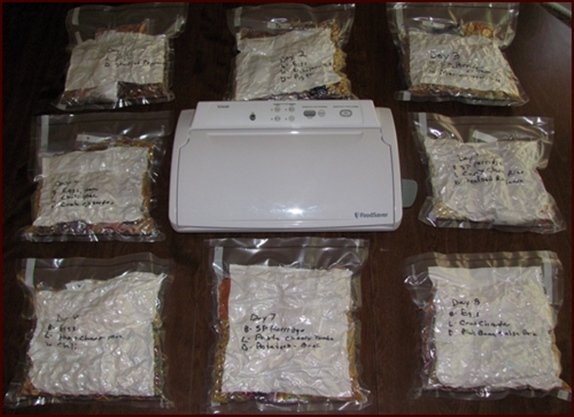
Photo: Vacuum sealed daily rations for an 8-day backpacking trip on the Appalachian Trail. See the Menu & Food Drying Plan.
Vacuum Sealer Features
Choose a vacuum sealer that offers settings for both manual and automatic sealing. FoodSaver vacuum sealers also have a tube port, which can be used with a jar-sealing accessory.
Photo below: The inside of a FoodSaver Vacuum Sealer. They don’t make this model anymore, but the components are similar in newer models.
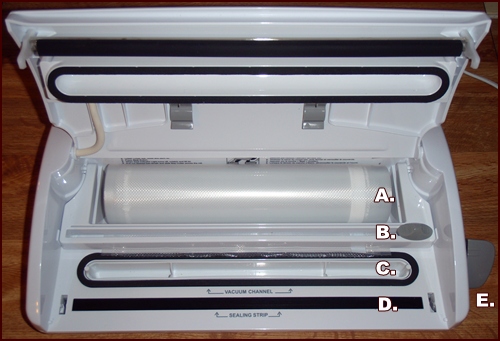
A. Compartment for continuous vacuum seal bag rolls
B. Sliding cutter
C. Vacuum channel where you place the open end of the bag
D. Sealing strip where the heat is applied to the bag
E. Knob locks lid and holds bag in place while sealing
Vacuum Seal Bags Make Great Water Bags
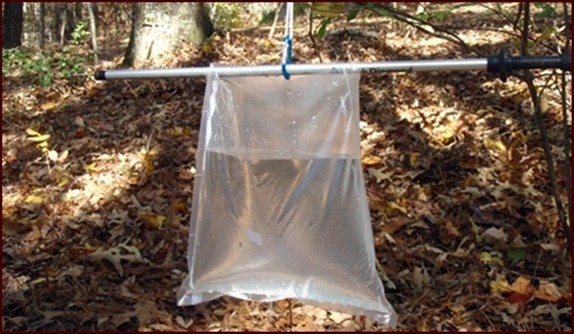
After you empty one of your vacuum seal bags of the daily rations, use it as a water bag to supply extra water at your campsite.
Now you have no excuse not to take a bath in the woods. See Tips for Making a Camping Water Bag.
Find Backpacking Food Storage Products shown on this Page on Amazon:
Vacuum Sealers & Bags
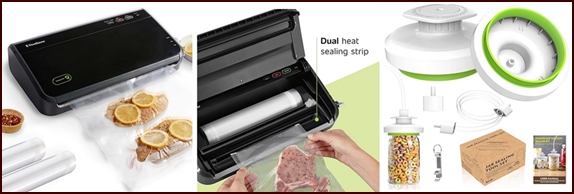
FoodSaver Vacuum Sealer Bag Rolls, 8" x 20', 3-Pack
Vacuum Sealer Kit for Wide & Regular-Mouth Mason Jars, works only with FoodSaver Vacuum Sealers
New: Electric Vacuum Jar Sealer Kit, stand-alone, does not require FoodSaver Vacuum Sealer
Mylar Bags & Oxygen Absorbers

100cc Oxygen Absorbers, 200 Pack, PackFreshUSA, plus Long-Term Food Storage Guide.
Disclosure: As an Amazon Associate, Backpacking Chef may earn a commission from qualifying purchases. Thank you.
Explore More...
Share this page with friends on social media.
Free E-book & Newsletter
Free with Trail Bytes subscription.
Dehydrating Food from A–Z

