No-cook Backpacking Meals
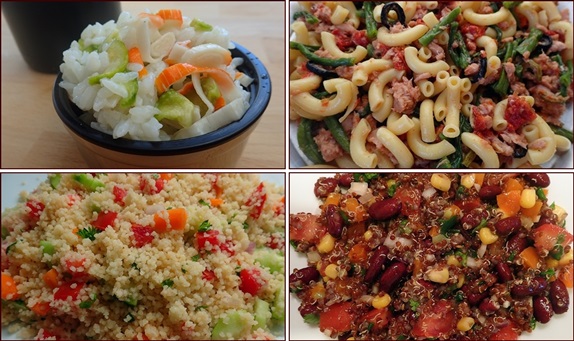
No-cook backpacking meals are just what you need for hiking in hot weather, or anytime you want to go stoveless on the trail. The following recipes use dehydrated ingredients which were chosen because they rehydrate well with cold water.
With cold-soak, stoveless backpacking meals, allow between 1½ to 3 hours for the ingredients to rehydrate. To enjoy these meals for lunch, add cold water after breakfast and hike on. A thermos food jar is ideal for rehydrating no-cook backpacking meals because the meals will stay cold. A light-weight plastic container with a tight-fitting lid will also work, but if you’re hiking in hot weather, the meal may be less refreshing without the insulating advantage of a thermos.
Recipes for No-cook Backpacking Meals
Edamame Hummus Tortillas
Edamame
beans are immature soy beans with a bright green color. They are usually sold
frozen with the outer pods removed. Unlike other beans, edamame beans are
considered a complete protein because they contain all the essential amino
acids that the body needs and can’t produce itself. Source: Nutritional
Benefits of Edamame.
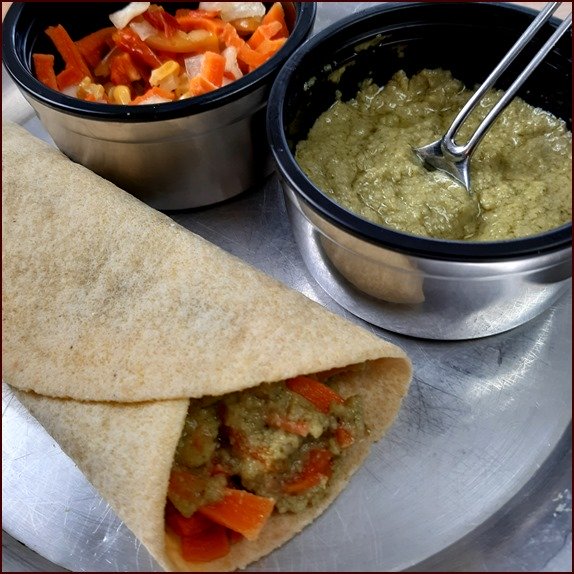
Photo: Edamame hummus powder rehydrates instantly with cold water. It makes a quick, no-cook backpacking meal for lunch when paired with extra veggies and tortillas.
This instant edamame hummus recipe combines cooked edamame beans with traditional hummus ingredients: chickpeas, garlic, basil, and lemon juice. Olive oil is added on the trail when rehydrating the powdered hummus.
Yield: Approximately 12 tablespoons, enough to make 6 tortillas.
Ingredients:
- 2 cup edamame beans (250 g)
- ½ can chickpeas (125 g)
- ¼ cup lemon juice (1 lemon)
- Handful fresh basil leaves (10 g)
- 2–3 cloves garlic
- ½ tsp salt
- Ground pepper to taste
- 1½ cup water
Optional Ingredients:
- 1–2 tsp. toasted sesame seeds (add before blending)
- 1–2 tsp. sriracha sauce (stir in after blending)
- 1–2 Tbsp. Thai green curry sauce (stir in after blending)
Ingredient added on the Trail:
- 1 Tbsp. extra-virgin olive oil per tortilla
Preparation:
Although food companies steam edamame beans before freezing them, they are still pretty hard. It’s beneficial to soften them up by cooking. Edamame beans should not be eaten raw, as that could cause serious digestion problems.
Add edamame beans to a pot with 1½ cups water and salt. Bring to a boil and simmer for 4 minutes. Remove pot from heat and allow the beans and water to cool a little. Do not drain.
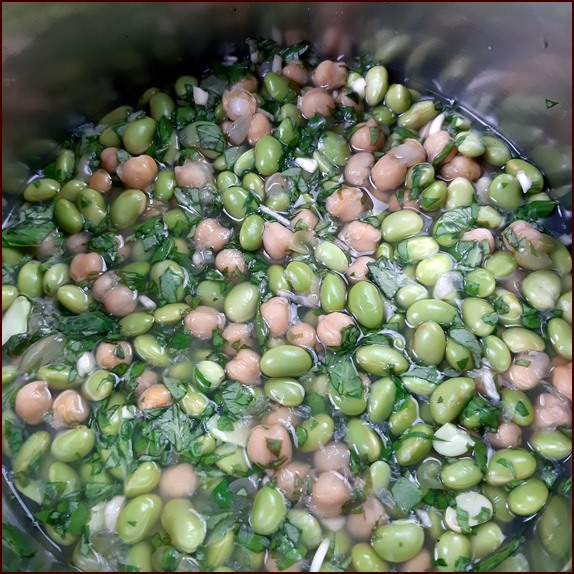
Photo: Chickpeas, basil, garlic, and lemon juice added to pot with cooked edamame beans.
Rinse chickpeas and add to the pot with lemon juice, chopped basil leaves, and minced garlic. If using toasted sesame seeds, add them also.
Transfer prepared ingredients to a blender and blend until smooth. Add a few tablespoons of water if necessary to help the blender along.
Taste hummus and adjust salt and pepper as needed. For a little heat or spice, stir in sriracha sauce or Thai green curry sauce to taste.
Dehydrating Edamame Hummus
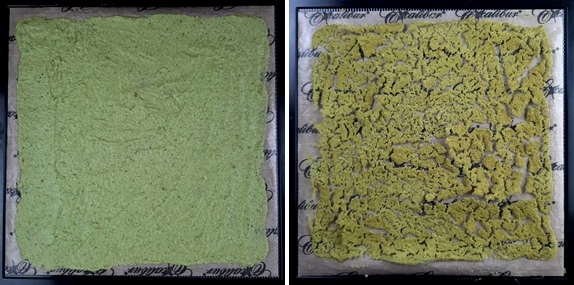
Spread mixture thinly on dehydrator trays covered with nonstick sheets. Two Excalibur dehydrator tray were used for this recipe.
Dehydrate at 135°F (57°C) for approximately 6 hours. Dried hummus will easily crumble by hand.
Grind dried hummus into powder in blender. This recipe yields approximately 12 tablespoons of hummus powder.
On the Trail:
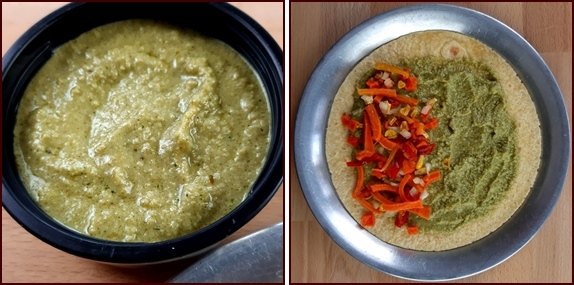
Servings: Fills 2 Tortillas
Ingredients:
- 4 Tbsp. edamame hummus powder
- 6 Tbsp. cold water
- 2 Tbsp. extra-virgin olive oil
- ¼ cup dehydrated vegetables (15 g)
- 2 tortillas
Dehydrated vegetables need 2 hours to rehydrate to an enjoyable texture in cold water. Add dried vegetables to a thermos or other container with a tight fitting lid. Cover vegetables with a ½-inch of water. The prepared tortillas shown in the photos included a pinch each of carrots, red bell peppers, pumpkin, tomatoes, onions, and corn. To enjoy the tortillas for lunch, begin rehydrating the vegetables after breakfast.
At lunchtime, rehydrate 4 Tbsp. hummus powder with 6 Tbsp. water. Stir. It will thicken in a couple of minutes. Then stir in olive oil.
Spread hummus and vegetables on tortillas and enjoy your lunch.
Dehydrating Traditional Hummus

Here's another page with a fantastic recipe for traditional hummus and how to dehydrate it.
Dehydrating Chickpeas & Hummus.
Sushi Rice Bowl
This no-cook backpacking meal includes dehydrated sushi rice, cucumbers, and surimi. It’s like a California sushi roll in a bowl, without the avocado. You can add fresh avocado on the trail, but don’t bother dehydrating avocado, because it turns brown and doesn’t rehydrate well.
I’ll cover the cooking and dehydrating instructions first, then show how to assemble the meal and rehydrate it on the trail.
How to Cook & Dehydrate Sushi Rice
Sushi rice is a short-grain rice which is cooked with less water than is used to cook long-grain rice. If available, choose Japanese sushi rice. Rice vinegar is added to the rice after it is cooked.
The ingredients needed to make sushi rice, besides the short-grain rice, are rice vinegar, sugar, and salt. Check the ingredients list of the rice vinegar you buy; it may already include sugar or salt. The rice vinegar used for this recipe included sugar, but no salt.
If the rice vinegar contains no salt or sugar, add those items to the rice vinegar in a pot and heat on low temperature until the salt and sugar dissolve. You can do this while the rice is cooking. Overheating the rice vinegar will cause a loss of flavor. That is why you do not add it to the rice until after the rice is cooked.
To cook 1¼ cups (250 g) of sushi rice, use 5 tablespoons of rice vinegar, 2½ teaspoons sugar, and 1 teaspoon salt. Leave out salt or sugar if already present in the rice vinegar.
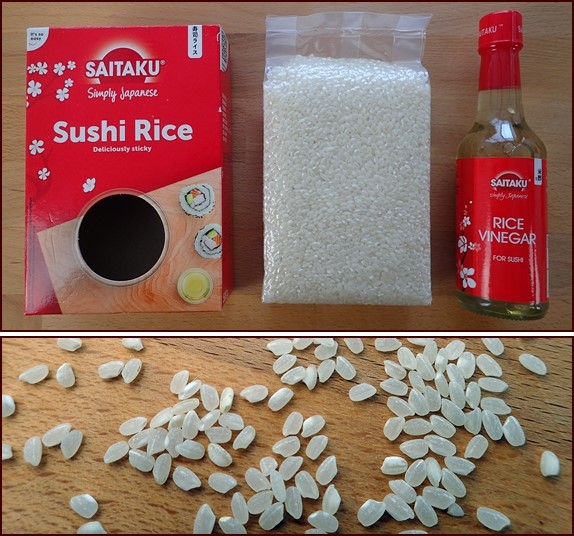
Photos: Sushi rice is made with short-grain rice and a solution of rice vinegar, sugar, and salt. Sugar or salt may already be in the vinegar. Check the label.
How to Cook Sushi Rice
Rinse rice several times with cool water. The water will turn chalky at first due to the high starch content of the rice.
Add the rinsed rice to a pot with the cooking water and soak it for thirty minutes.
- 1¼ cup sushi rice (250 g)
- 1½ cup water (350 ml)
Bring to a boil, then reduce heat to a low simmer for ten minutes with the lid on the pot.
After ten minutes, turn off the stove, and let the rice sit for fifteen minutes, keeping the lid on the pot. Important: Don’t let any steam escape by lifting the lid off the pot. Your patience will be rewarded with perfect sushi rice.
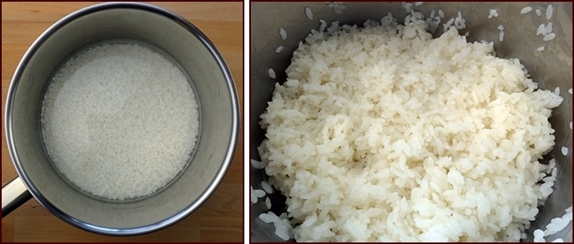
Photos: Rinsed sushi rice, soaked for 30 minutes, and then cooked.
Add the Rice Vinegar, Sugar, and Salt Solution
Professional sushi chefs use wooden bowls and spoons when mixing rice vinegar with rice. I used a wooden spoon and did the mixing in the pot. The objective is to be gentle with the rice. Drizzle the rice vinegar/salt/sugar solution over the rice and mix it in with a folding motion with the spoon.
Dehydrating Sushi Rice
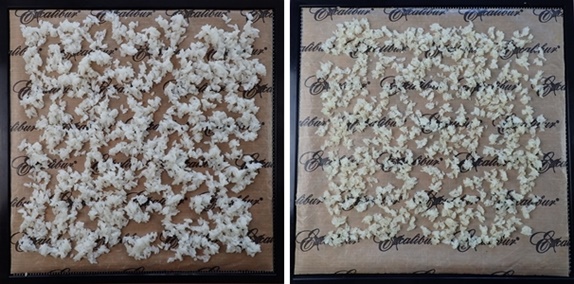
Photos: Dehydrating sushi rice before and after.
After you mix in the rice vinegar, and the rice has cooled a bit, place it on dehydrator trays covered with nonstick sheets. Two Excalibur dehydrator trays were used in this example. Since the rice sticks together, place one teaspoonful of rice at a time on the trays, leaving space between the little piles. Then, spread the little piles out a little more.
Dehydrate at 145°F (63°C) for 4–6 hours. When rice is almost dry, pull apart some of the rice that is sticking together and redistribute on the trays. Rice will be hard when dry.
Yield: 2¼ cup dried rice (240 g)
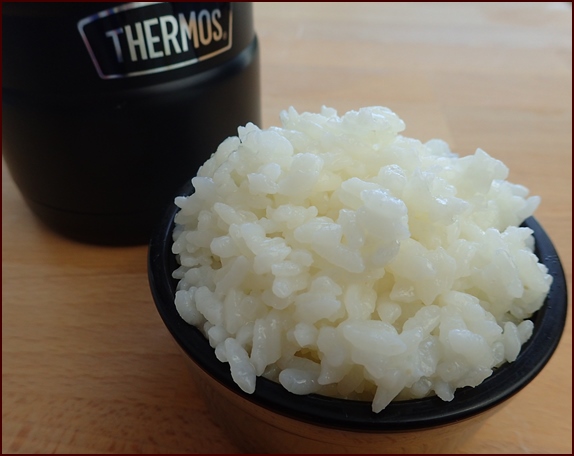
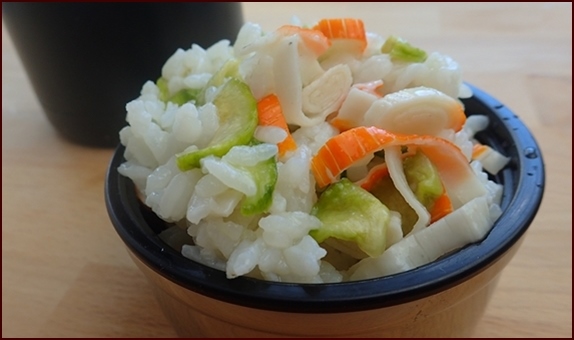
Photo: Sushi rice rehydrated with cold water in a thermos food jar after one hour.
For this example, ¾ cup dried sushi rice (80 g) was rehydrated with ½ cup cold water (112 ml). Rice was firm, not hard, with good texture. The sushi rice retained its sour, sweet, and salty flavors.
Complete the Meal
Sushi rice, surimi, cucumber, and avocado are the ingredients found in popular “California sushi rolls.” As mentioned previously, avocado does not dehydrate well, so carry a fresh one if you want to include it.
Surimi, which resembles the meat of snow crab legs, is a processed food which contains fish and flavors of crustaceans, as well as starches and coloring. You can find it in various shapes and marketed as “artificial crabmeat” or “seafood sticks.”
Dehydrating Surimi
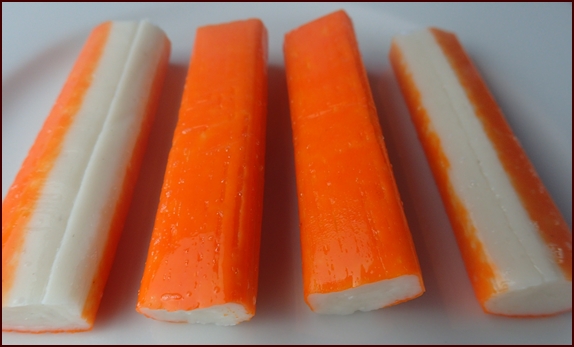
Photo: Surimi shaped like seafood sticks.
Slice seafood sticks crosswise into ¼ inch thick pieces, and place them on mesh dehydrator tray in a single layer.
Dehydrate at 145°F (63°C) for 5–6 hours until hard.
Yield: A 235 gram package of surimi will yield ¾ cup of dried surimi (69 g).
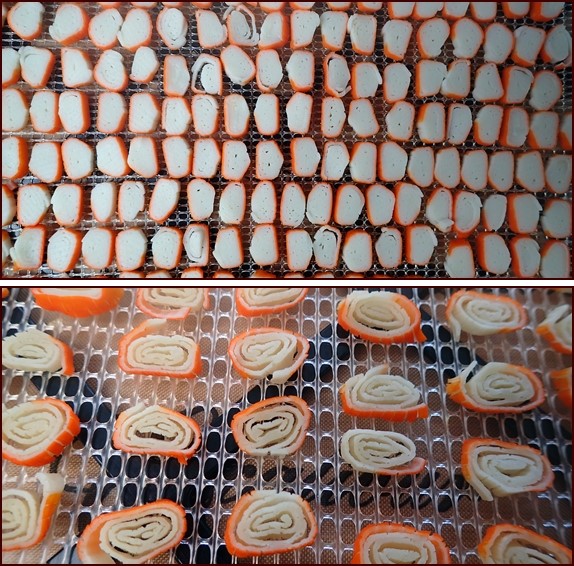
Photos: Dehydrating surimi, before and after. The pieces will shrink while drying.
Dehydrating Cucumbers
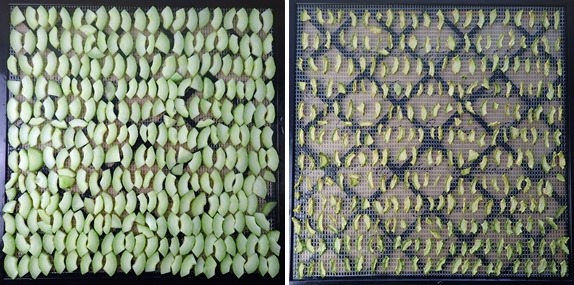
Photos: Dehydrating cucumbers before and after. Beginning quantity on one Excalibur dehydrator tray was 1¼ large cucumbers.
Peel cucumber, cut in half longwise, and scrape out seeds with a spoon. The central part of cucumbers surrounding the seeds tends to oxidize (turn brown) while drying, so you’ll have better-looking dried cucumbers if you remove that part.
Slice the cucumber halves one more time so you have four quarters, and then slice crosswise ⅛–¼ inch thick (½ cm). To reduce browning even more after cutting, cucumbers may be dipped in a solution of 1 cup water and ¼ cup lemon juice.
Dehydrate at 135°F (57°C) for 7–8 hours. Dried cucumber will be pliable.
Yield: 1¼ large cucumbers (1 lb. after processing) will yield ¾ cup (23 g) when dry.
Assemble Sushi Rice Bowl
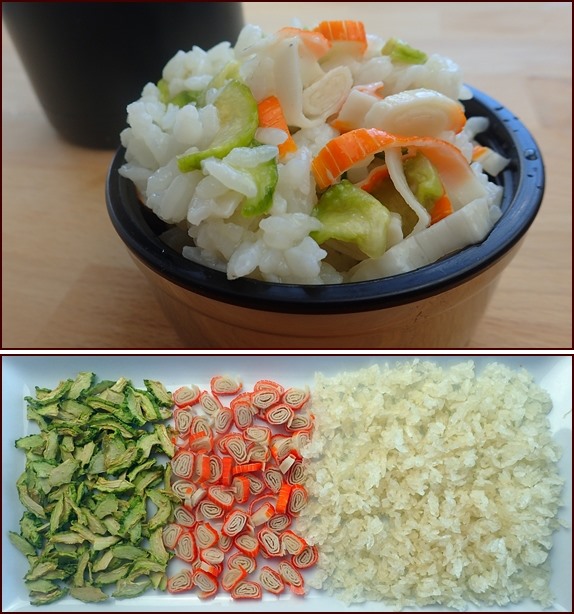
Photos: Dehydrated cucumbers, surimi, and sushi rice rehydrated with cold water for a delicious and refreshing no-cook backpacking meal.
Servings: 1
Ingredients:
- ¾ cup dried sushi rice (80 g)
- ¼ cup dried surimi (20 g)
- ¼ cup dried cucumber (10 g)
- 1 cup cold water to rehydrate (253 ml)
Rehydration: Combine ingredients with cold water in thermos. For best results, wait 1½ hours. If waiting longer, rehydrate with a little extra water.
For a larger serving, use 100 grams sushi rice, 25 grams surimi, 12 grams cucumber, and 1¼ cups cold water. Use a little more water for longer soak times.
Peach Salsa Rice Salad
The salsa part of this no-cook backpacking meal makes a delicious offering at any party—next to a bowl of tortilla chips—or you can dehydrate it for the trail. Rehydrate it by itself, or combine it with rice for a zesty rice salad.
I’ll cover the peach salsa recipe first, and then show how to pair it with dehydrated short-grain rice.

Peach Salsa
Servings (Fresh): 11 cups.
Ingredients:
- 2 lb. diced tomatoes (900 g)
- 1¾ lb. diced peaches (800 g)
- 10 oz. diced bell peppers (290 g)
- 5 oz. diced onion (150 g)
- 2 diced cayenne peppers (20 g)
- 1 bunch cilantro, chopped (15 g)
- 1 lime, juiced
- 2 tsp salt
- ½ tsp pepper
- Optional: 1–2 Tbsp apricot or peach jam (20–40 g)
Salsa Preparation
Dice all vegetables and mix together with salt and pepper. Remove seeds from peppers before dicing.

Cayenne peppers are moderately-hot chili peppers, usually red in color with a skinny shape. They are suitable for dishes served to mixed-company where you don’t want to risk causing discomfort to sensitive tongues. If you like your salsa hot-hot, you may substitute a hotter pepper.
Cut a lime in half. Press and rotate the halves over a handheld juicer. Place the juiced contents in a bowl.
Peel and dice peaches. Place the diced peaches in the bowl with the lime juice as you work. Stir to coat peaches. Tip: Select ripe peaches with firm flesh. Overripe peaches will be harder to dice.
Depending on how sweet the peaches are, add one or two tablespoons of peach or apricot jam to the peaches.
Combine diced vegetables and peaches, and add chopped cilantro.
Let salsa sit for a few minutes, stirring to mix the flavors.
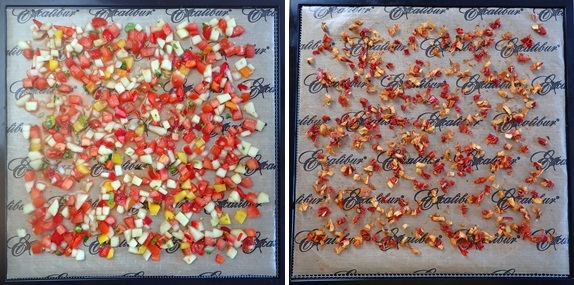
Dehydrating Peach Salsa
Spread salsa in a single layer on dehydrator trays covered with nonstick sheets. This recipe provides a little more than 2 cups of salsa on each of 5 trays. Include juices equally on trays.
Dehydrate at 135°F (57°C) for 15 to 18 hours. You can speed up drying by starting at 145°F (63°C) for 3 hours.
Active Dehydrating Tips: After 12 hours, peel salsa off nonstick sheets and redistribute. For the final hour, transfer almost dried salsa from 5 trays down to 2 trays. This will increase air flow.
Dried Yield: 3 cups (229 g)
To rehydrate peach salsa by itself, cover with cold water in a container and hike on. After 1 or 2 hours, enjoy as a snack with tortilla chips, or add it to a packet of tuna or chicken.
Dried peach salsa makes a fantastic no-cook backpacking meal when combined with dried rice.
Dehydrating Short-grain Rice
Dehydrated short-grain rice rehydrates great in cold water. For this recipe, use the same rice as was used to make the sushi rice salad. Follow the instructions for cooking and dehydrating sushi rice on this page, but cook the rice in salted water and omit the rice vinegar.
Double Portion:
- 2½ cup short-grain rice (500 g)
- 3 cup water (710 ml)
- 2 tsp salt
Yield: 4½ cups dried rice (470 g)
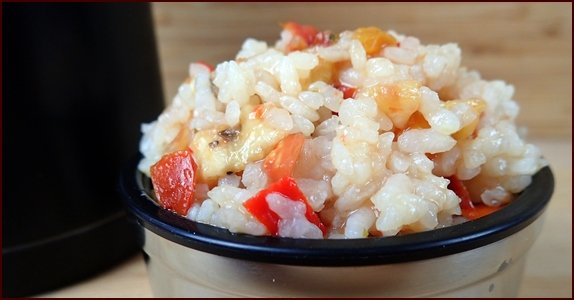
Peach Salsa Rice Salad
Regular Serving: ¾ cup dried short-grain rice (80 g), and ½ cup dried peach salsa (40 g). Rehydrate with 1 cup cold water (236 ml).
Large Serving: 1 cup dried short-grain rice (100 g), and ⅔ cup dried peach salsa (50 g). Rehydrate with 1¼ cup cold water (300 ml).
After adding water, wait at least 1 hour, but 1½–2 hours is best. For longer soak times, rehydrate with a little more water. A thermos food jar is the best way to rehydrate this no-cook backpacking meal. You want this zesty meal to be cold and refreshing on a hot summer’s day.
Disclosure: BackpackingChef.com participates in the Amazon Associates Affiliate Program and earns from qualifying purchases. Thank you.
Apricot-Mint Salsa Rice Salad
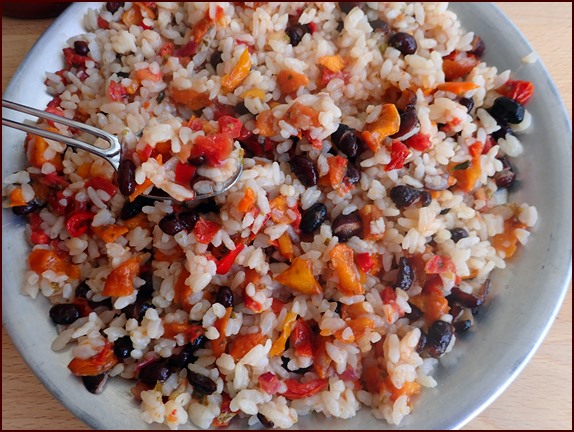
This recipe is similar to the peach salsa recipe, but uses apricots and fresh mint leaves for a unique, yet still spicy meal. Combine with rice and beans or take a tuna meal to the next level. The salsa is great all by itself as a dipping snack.
Explore the Apricot-Mint Salsa Recipe:
Dehydrating Apricots & Apricot Mint Salsa.
Mango Salsa Couscous Salad
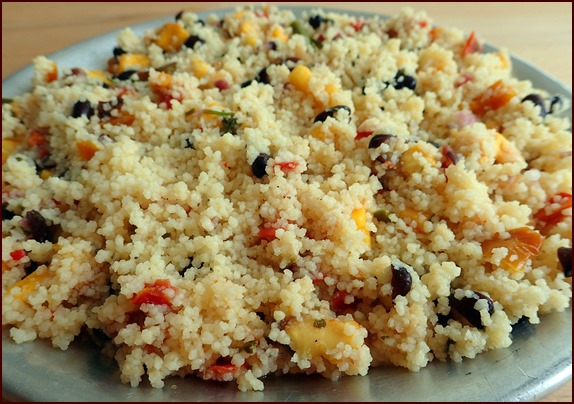
This recipe features homemade mango salsa which can be rehydrated with cold water with either couscous or rice.
Explore the recipes:
Dehydrating Mango & Mango Salsa.
Tuna & Pasta San Marzano
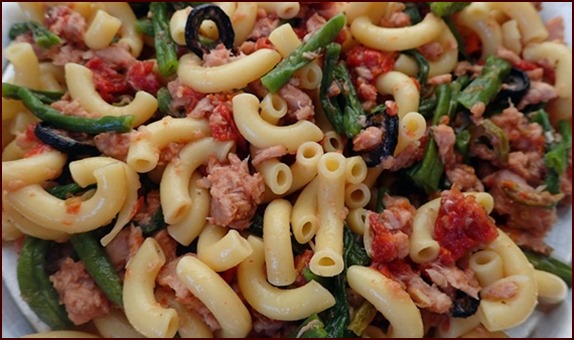
It takes 2½ hours to rehydrate macaroni with cold water. This no-cook backpacking meal also includes dried san marzano tomatoes, olives, green beans, and tuna.

For stoveless backpacking meals with pasta, you must precook and dehydrate the pasta at home before you hit the trail.
Explore this back issue of Trail Bytes:
How to Precook and Dry Macaroni.
Discover more recipes for no-cook backpacking meals in Chef Glenn's newletter, Trail Bytes. Subscribe, it's free.
Quinoa & Bean Cilantro Salad
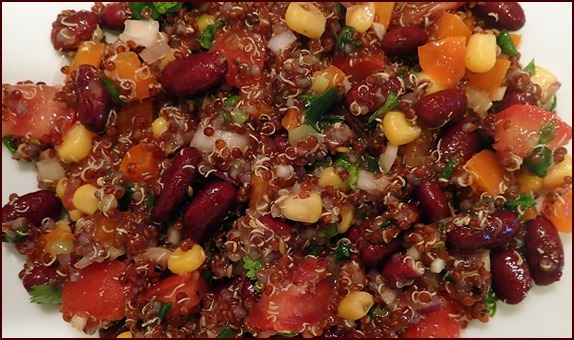
Quinoa is a nice change of pace from rice, and it is a good source of protein. It rehydrates well with cold water, so you can use it in a variety of refreshing no-cook backpacking meals.
This back issue of Trail Bytes includes the recipe:
Couscous Salads
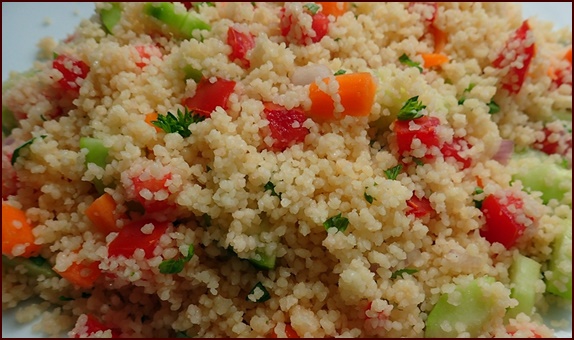
Overnight Couscous Salad. This no-cook backpacking meal is made at home the night before a hike, and is added to a thermos in the morning. It features fresh vegetables and lemon juice. Link takes you to a back issue of Trail Bytes.
Couscous Salad with Cucumber Salsa Dressing. This couscous salad is prepared on the trail with no-cooking. Couscous does not need to be precooked and dried. It plumps up nicely in cold water. Link takes you to a back issue of Trail Bytes.
Shrimp Cocktail Tortillas
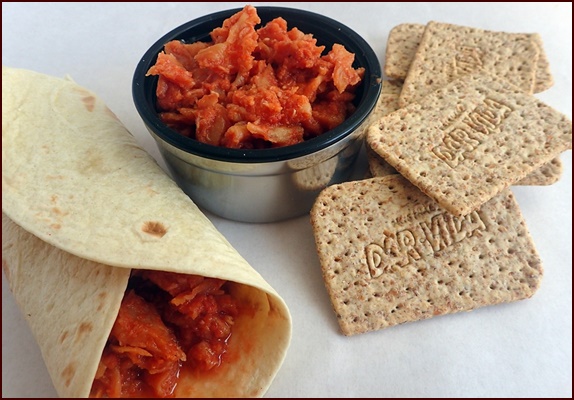
Dehydrated meat needs a longer soak time in no-cook backpacking meals. If you want to enjoy a delicious shrimp cocktail for lunch, simply add the cold water after breakfast. After 3 or 4 hours, the dehydrated shrimp will be chewy, but not hard.
See this Trail Bytes back issue for the recipe:
Gazpacho
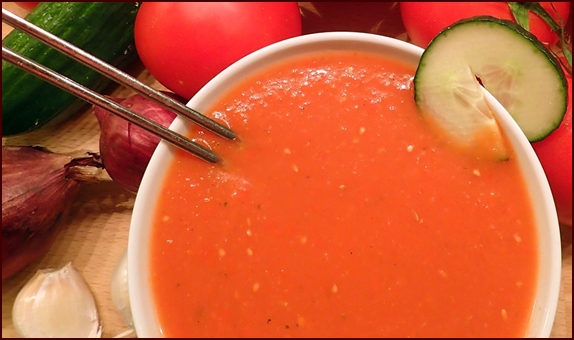
Gazpacho is a spicy tomato soup, served cold. It’s a nice side item to accompany other backpacking lunch favorites like tuna or cheese rolled up in tortillas.
This Trail Bytes back issue has the recipe:
No-cook Backpacking Meals for Breakfast
Overnight Bircher Muesli
Aside from the obvious choices of mixing up some powdered milk on the trail and pouring it over granola cereal, or hiking out of camp with a couple of power bars in hand, there are other ways to start your day with a no-cook breakfast.
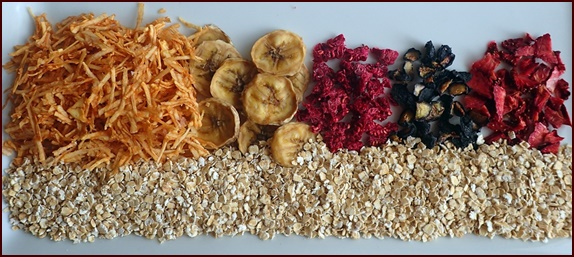
Oats are delicious when soaked overnight with fruits and berries.
See the Backpacking Breakfast page for the recipe:
Peach Granola Clusters & Peach Crunch Breakfast
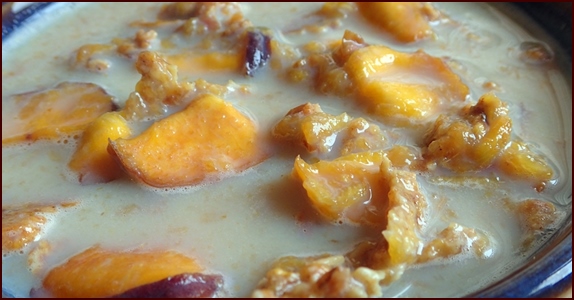
Dried fruit adds nutrition to trail breakfasts. Instead of eating it dry, soak the fruit overnight to plump it up.
Explore the Peach Granola Clusters and Peach Crunch Breakfast recipes:
Recipes for Adventure Books to Help You Make Better Backpacking Meals
Share this page with friends on social media.
Free E-book & Newsletter
Free with Trail Bytes subscription.
Dehydrating Food from A–Z

