Dehydrating Kiwi & Kiwi Fruit Leather
The key to dehydrating kiwi is to start with perfectly ripe kiwis. Overripe kiwis will have darker green, mushy parts, which get mushier when you slice into them. Ripe kiwi fruit is mildly tart and sweet, but overripe kiwis may taste sour. Underripe kiwis, on the other hand, are hard and almost tasteless.
So how do you choose perfectly ripe kiwis for dehydrating?
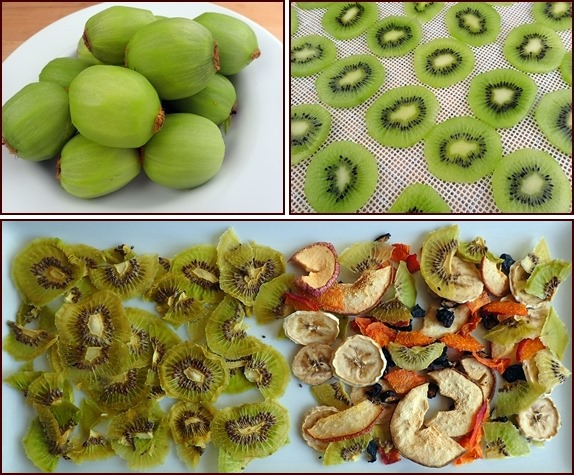
Photo: Dehydrating kiwi in slices. Dehydrated kiwi fruit has a sweet-tart flavor, and it tastes great in a snack sack with other dried fruits.
At the market, give the kiwi a gentle squeeze. There should be a slight give, but not much. If any part feels soft or spongy, leave it in the bin. Take a sniff at the stem end. If there is a pungent smell, then the kiwi is overripe. Chances are, you may have to select some kiwis that are hard and not fully ripe. That’s OK. Kiwis continue ripening after they are picked, so they will reach perfect ripeness in a 1–3 days on your countertop. They will ripen faster if you place them next to ripe bananas.
Watch a 1-minute video about choosing a ripe kiwi.
Table of Contents
Dehydrating Kiwi Fruit Leather (100% kiwi, banana-kiwi, peach-kiwi, and strawberry-kiwi fruit leathers)
How to Dehydrate Kiwi
Step 1: If dehydrating kiwi with the skin on, gently wash and dry the kiwis, and rub off some of the fuzz in the process. Keeping the skins on makes the dehydrated kiwi fruit more nutritious, but I’m not a fan of fuzz or the brown color, so I peel mine.
Step 2: Cut off both ends of the kiwis. You’ll find that the center parts at the stem end may be hard, so trim that quarter-inch of the cream-colored part away.
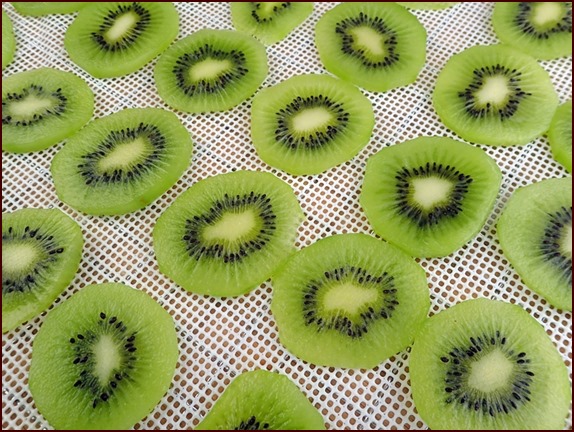
Photo: Sliced kiwi on silicone mesh dehydrator sheet.
Step 3: Cut kiwis crosswise into ⅛ to ¼-inch thin slices and arrange in a single layer on a nonstick mesh dehydrator sheet. Dehydration time can be reduced slightly if you cut the kiwis longwise into halves or quarters before slicing.
Step 4: Dehydrate kiwi at 135°F (57°C) for 10+ hours until no moisture appears when you tear pieces in half. Dehydrated kiwi fruit will be pliable, almost snappy; dried slices will mostly bend and not break.
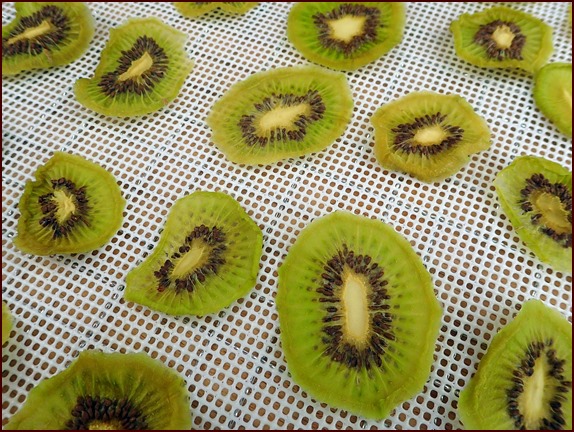
Photo: Dehydrated kiwi fruit slices.
Yield: 5 kiwis, approximately 500 grams after peeling and slicing, will fit on 2 Cosori dehydrator trays. The dried kiwi will fill 2 cups and weigh approximately 75 grams.
Storing Dehydrated Kiwi Fruit
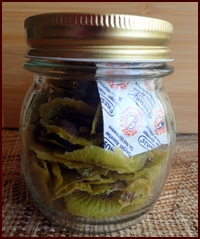
Let kiwi cool completely, then place in an airtight container such as a mason jar. To minimize oxidation, use the smallest jar possible to hold the dehydrated kiwi. For longest shelf life of a year or more, enclose an oxygen absorber or use a vacuum-sealing device. After a couple of days, check the container for moisture forming on the inside. If you see any moisture, place kiwi back in the dehydrator and continue drying.
For short term dehydrated kiwi storage of a month or two, it’s OK to store it in a Ziploc bag away from light, heat, and moisture.
Explore more: Backpacking Food Packing & Storage.
Dehydrated Kiwi on the Trail
Dried kiwi tastes great—sweet and tart—all by itself, but it also fits in nicely with a snack sack of assorted dried fruits.
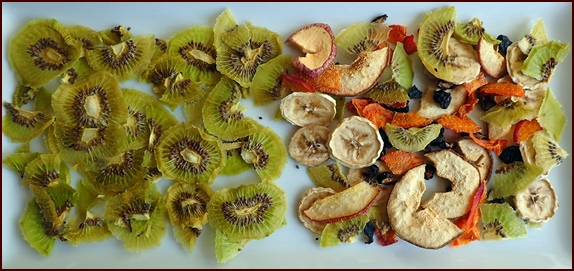
Photo: Dehydrated kiwi with dried pears, bananas, apricots, and blueberries.
Kiwi-Mixed Fruit Cocktail
Combine ½-cup dried fruits (25 g) with ½-cup cold water. Double these quantities for a large serving. Let soak at least 30 minutes, up to several hours for best rehydration. Tip: If you use more water, you will have a little flavorful fruit juice to enjoy. It’s very refreshing on a hot day in the woods.
I use a thermos food jar for rehydration. It keeps the fruit cocktail nice and cold, but any container with a tight-fitting lid will work.
Explore more: Rehydrating Food with a Thermos Food Jar.
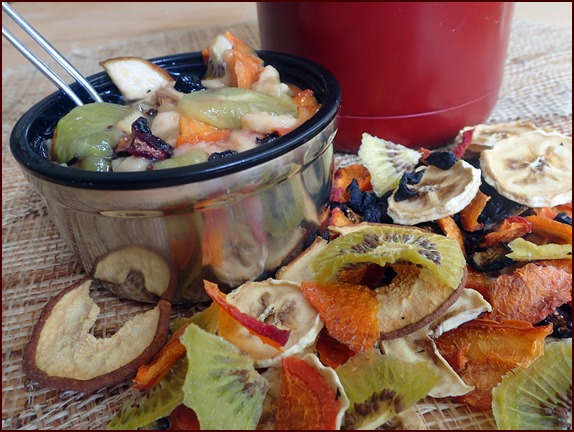
Photo: Dehydrated kiwi and mixed fruit rehydrated into a fruit cocktail.
Dehydrating Kiwi Fruit Leather
First the good news: Kiwi forms a nice fruit leather and has a unique sweet-tart flavor. It combines well with other fruits and berries on the sweet side.

Now the bad news: That lovely lime green kiwi color goes bye-bye when you run kiwi through a blender. The tearing apart of cells and rapid exposure to air expedites oxidation. You’ll end up with kiwi fruit leather in the range of light golden-brown to tan-brown.
Except... when you make kiwi fruit leather with colorful red berries, like
strawberries. You’ll love the red color and taste of that combination, so that's more good news.
How to Dehydrate Kiwi Fruit Leather
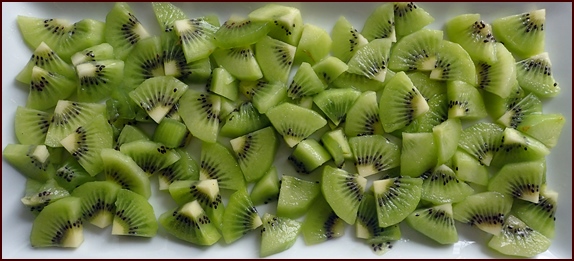
Step 1: Peel and cut kiwi into pieces.
Step 2: Run kiwi pieces through a blender until smooth.
Optional ingredient: Honey. If making 100% kiwi fruit leather, you can balance the tartness with a tablespoon of honey. If you use any more than that, the leather will turn out sticky. When combining kiwi with another fruit or berry, you won’t need to sweeten it.
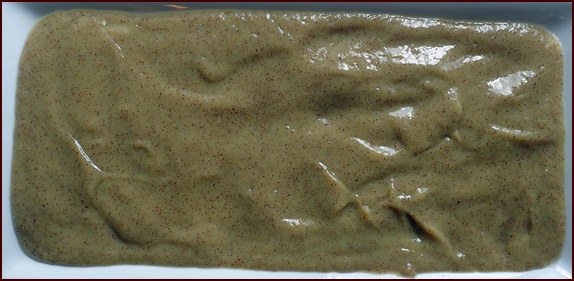
How much kiwi to use? Expect 3–4 kiwis to yield 2 cups of pieces, which amounts to 1½ cups (350 g) after blending. This quantity is ideal to spread on one silicone dehydrator tray in a Cosori dehydrator. If using a smaller, round dehydrator, then spread less kiwi per tray.
Photo: A silicone dehydrator tray containing 1½ cups of blended kiwi.
Step 3: Spread blended kiwi thinly on nonstick dehydrator trays.
Step 4: Dehydrate kiwi fruit leather at 135°F (57°C) for 10+ hours until no dampness remains on either side. Dried leather will be pliable and will fold without breaking into pieces.
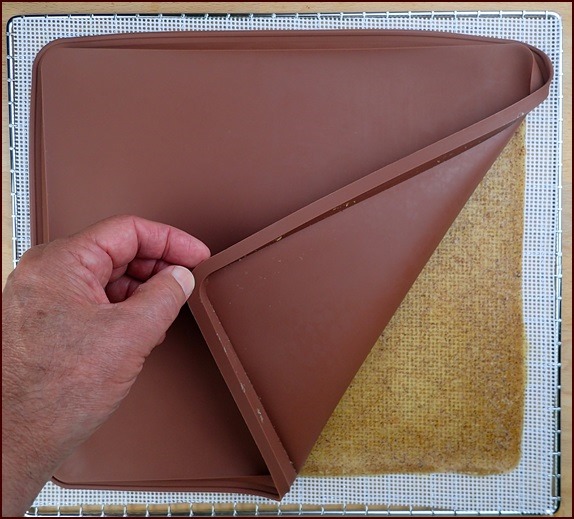
Photo: Peach-kiwi fruit leather flipped onto a silicone mesh sheet to finish drying.
Step 5: When the fruit leather is substantially dry after 8+ hours, flip it onto a mesh sheet and peel off the nonstick tray. This will ensure complete and faster drying of the bottom side. If your fruit leather finishes drying during the night, do the flip trick in the morning and run the dehydrator until the bottom side is as dry as the top side.
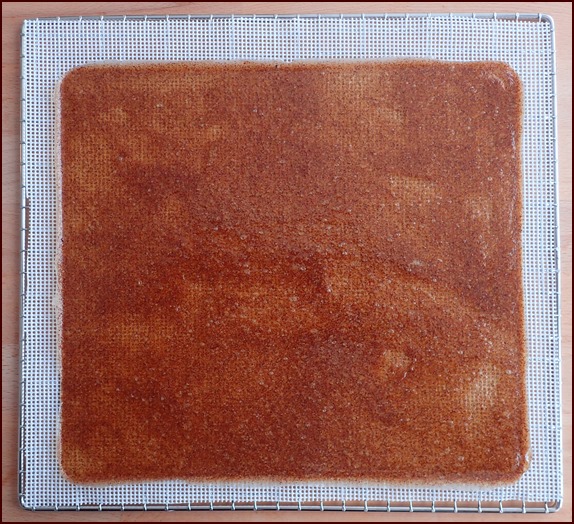
Photo: Banana-Kiwi fruit leather after drying.
Favorite Kiwi Fruit Leather Recipes
Each of these recipes makes approximately 1½ cups of blended fruit to make 1 fruit leather. You can vary the percentages from 50/50 of each fruit, to any percentages you like. Try apple, pear, and mango, too!
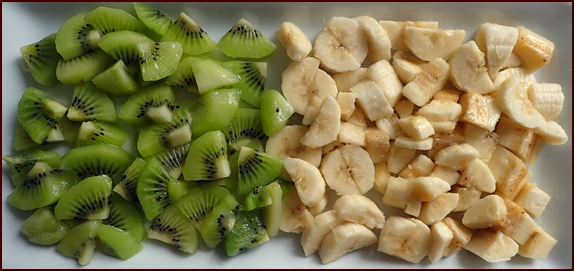
Banana-Kiwi Fruit Leather
- 2 bananas
- 2–3 kiwis
- Approximately 175 grams each.
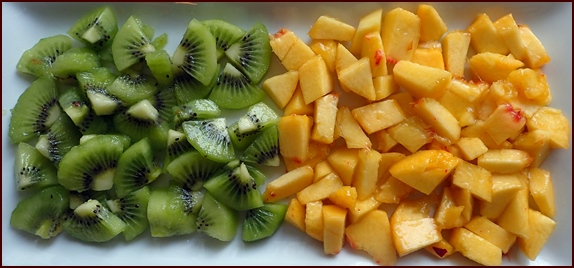
Peach-Kiwi Fruit Leather
- 2–3 peaches
- 2–3 kiwis
- Approximately 175 grams each.
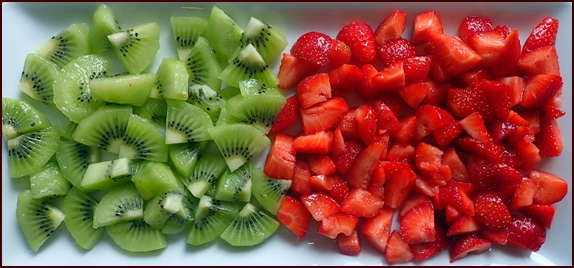
Strawberry-Kiwi Fruit Leather
- 1 cup strawberries
- 2–3 kiwis
- Approximately 175 grams each.
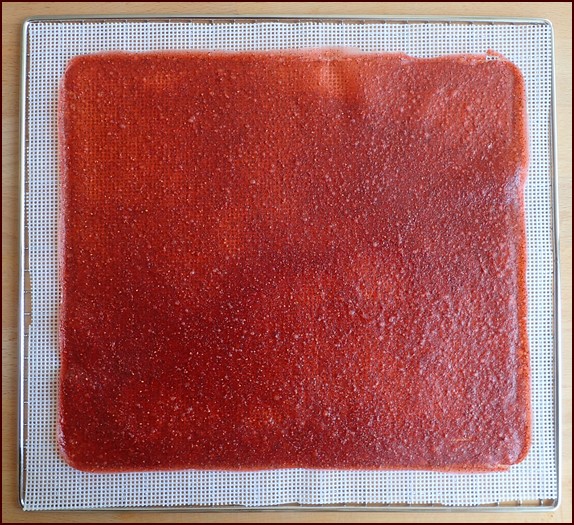
Photo above: Blended kiwi and strawberries on silicone dehydrator tray.
Photo below: Strawberry-kiwi fruit leather after flipping onto silicone mesh dehydrator sheet.
Storing
& Packing Kiwi Fruit Leather

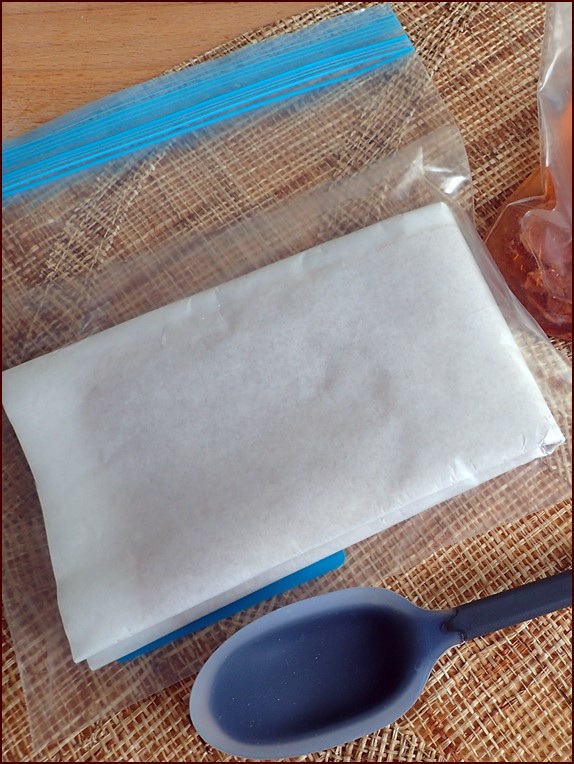
Fold fruit leather up in parchment paper as shown above. Place 2 or more folded leathers in a Ziploc bag and store away from light, heat, and moisture. If storing for more than a month, place packaged fruit leathers in a Tupperware container in the refrigerator.
Kiwi Fruit Leather on the Trail
Kiwi fruit leathers are delicious to snack on while you hike. Just tear off a strip at a time.
But here’s an idea…
Pack two fruit leathers in a Ziploc bag.
Eat one in the morning while you hike.
Turn the other one into a fruit smoothie in the afternoon.
Step 1: Tear 1 fruit leather sheet into pieces and place in Ziploc bag with 1 cup of cold water.
Step 2: Let sit 10–15 minutes, and then shake and squeeze the leather while gripping the enclosure end. Continue working it until smooth.
Step 3: Optional. Mix up a few spoonfuls of powdered milk or powdered coconut milk with half-a-cup of cold water in a separate container. Stir into the smoothie. Chia seeds are another possible addition.
Eat right out of the bag with a long handled spoon. Rinse and reuse the bags when you get home from a trip.
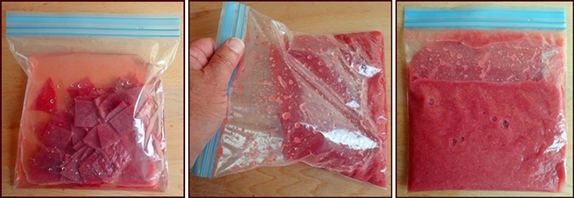
Kiwi Fruit Leather at Home
This method works well at home for making a smoothie-a-day with fruit leather, and you can keep them cold in the fridge. Stir in a little yogurt, milk, or something non-dairy like coconut milk. Delicious and healthy!
Or make it a milkshake with a scoop of vanilla ice cream.
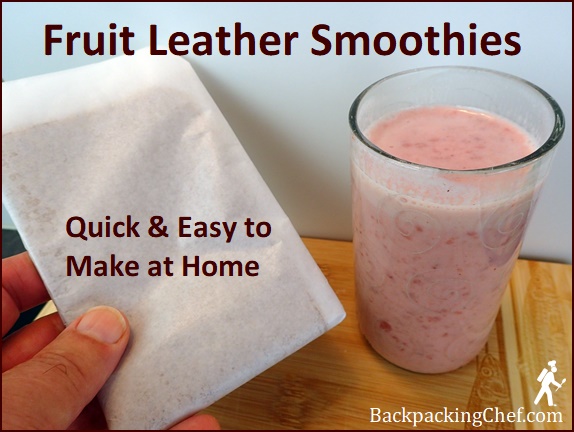
Photo: Strawberry-kiwi fruit smoothie made at home with fruit leather and yogurt.
Cosori Dehydrator & Accessories
Shop Amazon for the Cosori dehydrator and accessories used for dehydrating kiwi and kiwi fruit leather on this page. The silicone trays and silicone mesh sheets are flexible, truly nonstick, and are very easy to clean. Mesh sheets can be cut to size with scissors.

Left: Silicone Dehydrator Trays with Raised Edges, 11.8" x 10.8", 6-Pack
Middle: Cosori Dehydrator, Stainless Steel, 6-Trays
Right: Silicone Mesh Dehydrator Sheets, 14” x 14”, 12-Pack
Disclosure: As an Amazon Associate, Backpacking Chef earns from qualifying purchases. Thank you!
Share this page with friends on social media.
Free E-book & Newsletter
Free with Trail Bytes subscription.
Dehydrating Food from A–Z

