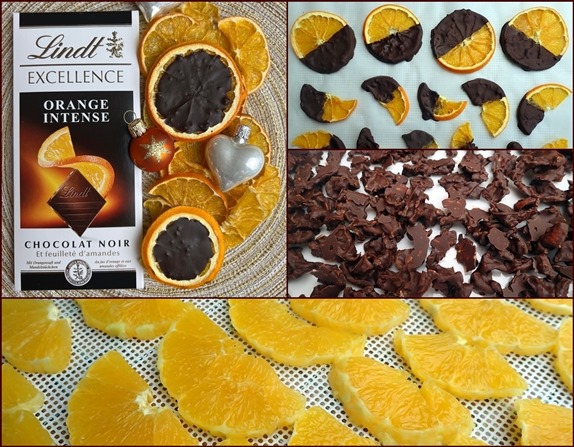
Chocolate Covered Oranges: Take a Dip into Delicious!
Chocolate covered oranges are easy to make, but hard to resist. They’re a special treat at holiday parties, and you can package them with bows and ribbons to give as gifts. The only problem is that you may eat them all before the guests arrive.
Photo: Explore the different ways of cutting and coating oranges with chocolate.
Making chocolate covered oranges is an activity the whole family will enjoy. For a neat gift idea, package dried orange slices with a couple bars of dark chocolate. Dip some of the oranges in chocolate to give the idea, but leave most of them plain so that the family on the receiving end can have a fun activity.
What do chocolate covered oranges taste like? At first bite, you get the rich chocolate flavor. Dark chocolate is best for dipping or coating oranges. If you leave the peels on dried oranges, then the next phase is the crunch. The peel has a slightly bitter taste, but that is smoothed over by the chocolate. Then comes the orange zing as you munch into the fruit and the whole delicious concoction juices up in your mouth.
Cut oranges into circles, half-circles, or little pieces, and dry them with or without the peels. Lightly sweeten orange pieces with vanilla sugar before baptizing them in chocolate. We’re talking full immersion. You will be amazed. They’re better than candy and seriously addictive.
Read on and explore the many delicious ways to make chocolate covered oranges.
Table of Contents:
How to Dry the Oranges in a Dehydrator
How to Cut the Oranges
Use seedless oranges, like navel oranges, for dipping into chocolate. You don’t want to contend with picking seeds out after you slice the oranges, and you definitely don’t want any seeds in the glorious chocolate-orange creations you serve to your guests.
The Circle or Half-Circle Cuts
The most popular way to cut oranges for chocolate dipping is to slice them thinly into circles with the peels on.
Wash oranges to remove any possible pesticides from the skins. Organic oranges are a good choice.

Photo: Thinly sliced oranges with peels left on, place on a nonstick dehydrator sheet.
Slice oranges crosswise about ¼-inch (.5 cm) thick with a sharp knife. A mandoline slicer also works well to achieve uniform thickness.
The ½-inch or so cuts from the ends will not be suitable for dipping, since there won’t be much orange flesh in the ends.
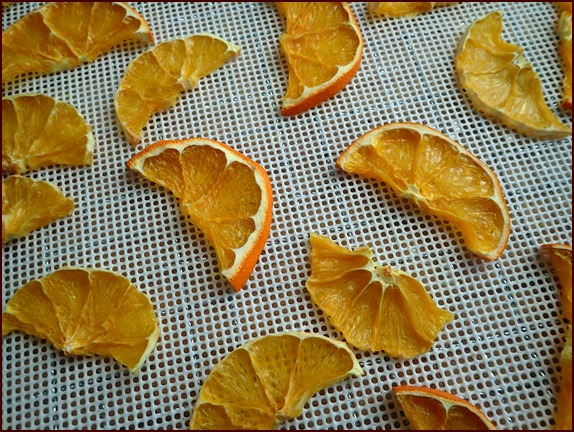
Photo: Oranges cut into half-slices.
Half-slices are another way to cut oranges, and it’s easier to make uniform cuts because the orange is stabilized on its cut side while you slice downward.
Cut the orange in half longwise, then cut each half into slices with the cut side down.
The Peeled Cut
Navel oranges are the best choice for dipping in chocolate because they have no seeds. While the flesh is sweet and juicy, they tend to have a lot of pith under the skin, which tastes bitter. Slicing them thinly minimizes the bitterness while retaining the bright orange color of the peel.
If you want to enjoy only the sweetest part of the orange, simply peel it with your fingers.
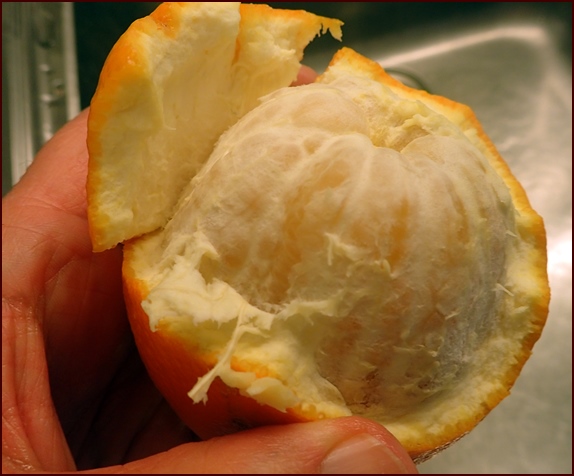
Photo: Peeling an orange before slicing it.
After you peel and pull off as much pith as you can, gently divide the orange into two parts.
This also gives you an opportunity to remove pith running down the center of the orange.
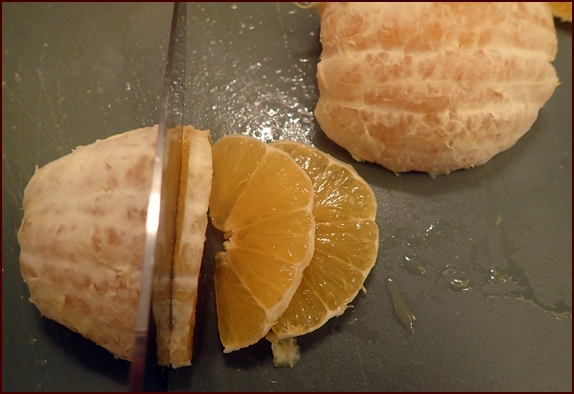
Photo: Slicing half of a peeled orange.
Slice peeled orange thinly with the flat side down and place the slices in dehydrator on nonstick sheet.
Cutting Orange Pieces
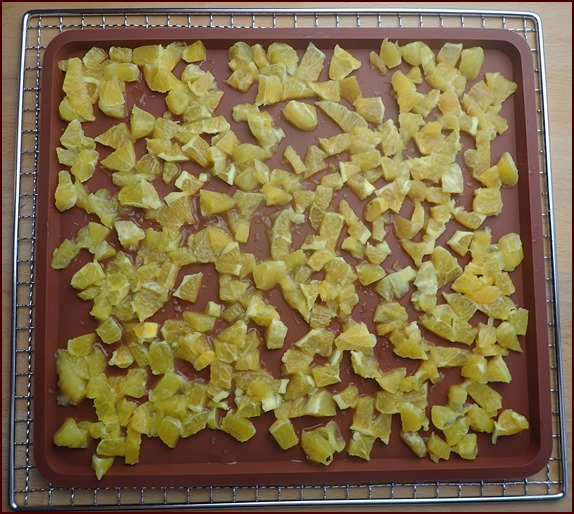
During the process of slicing oranges, you may end up with some irregular shapes or slices that are too thin or too thick. Save these for making chocolate covered orange pieces. Or cut pieces intentionally by cutting orange sections crosswise several times. Smaller is better, as thick pieces will take longer to dry.
How to Dry Oranges in a Dehydrator
Slices
Place orange slices on a nonstick sheet in a single layer.
Dehydrate at 135°F (57°C) for approximately 14–16 hours until almost snappy, but still bendable.
It’s important not to dry oranges above 135°F (57°C). At higher temperatures, they will turn brown.
Lemons or limes should be dried at an even lower temperature, no hotter than 115°F (46°C), as they turn brown above 115°F (46°C).
Explore my Dehydrating Oranges page for more instructions.
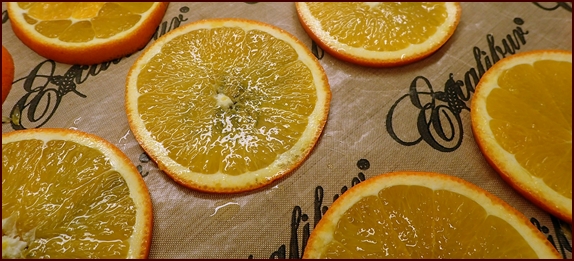
Photo: Orange slices (including peels) on a solid nonstick dehydrator sheet. Use these if the oranges are especially juicy.
A good alternative to using solid nonstick dehydrator sheets is to use silicone mesh drying sheets shown below. They allow more air to flow through the oranges.
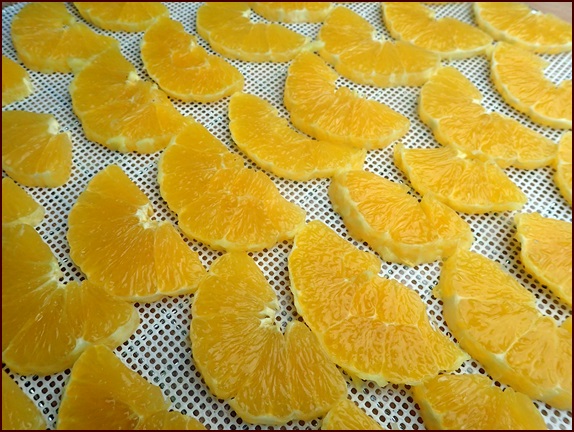
Photo: Peeled oranges cut thinly into half-circles on a silicone mesh dehydrator sheet.
Orange pieces can be dried on a nonstick sheet or in a silicone dehydrator tray. Before the pieces are fully dry, sweeten them with a little vanilla sugar for amazing results.
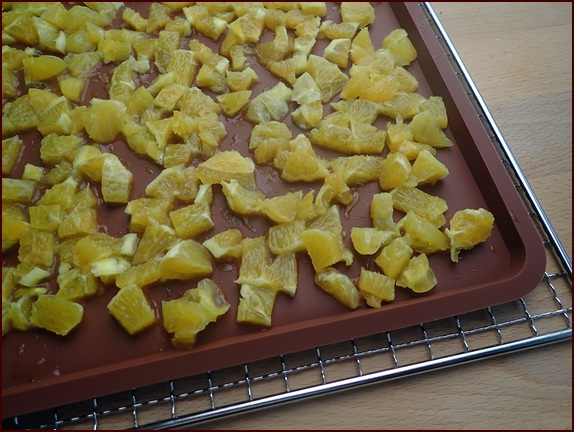
Photo: Orange pieces on a nonstick silicone dehydrator tray.
Sweetening the Orange Pieces
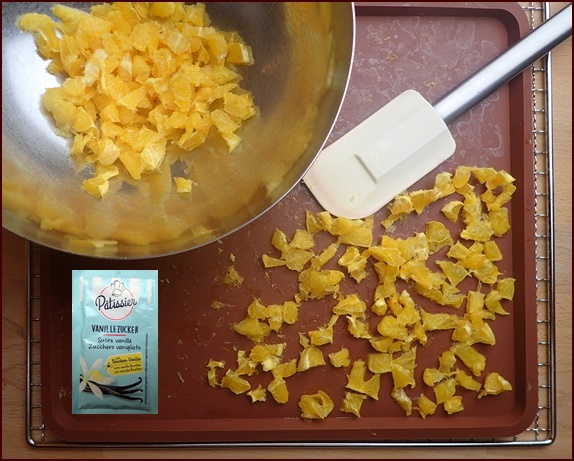
Photo: Sweetening partially-dried orange pieces.
After 5–6 hours, while there is still some moisture in the orange pieces, transfer the pieces to a bowl and stir in a 10 gram packet of vanilla sugar. If you don’t have vanilla sugar, use 2 teaspoons of regular sugar. Let the pieces sit for a few minutes before returning them to the dehydrator.
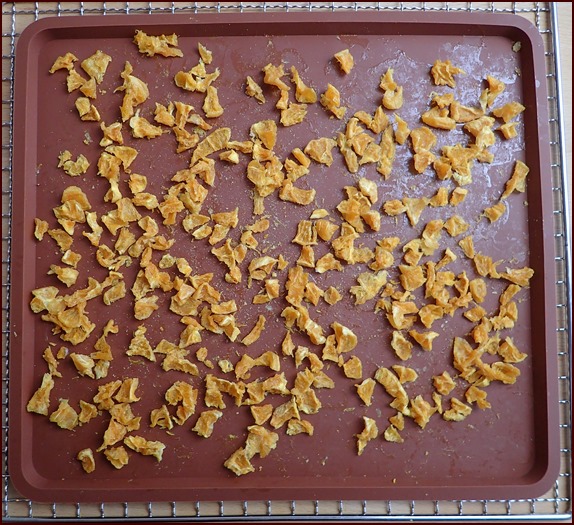
Photo: Dried orange pieces ready to be covered in chocolate.
How to Melt the Chocolate
The best chocolate for making chocolate covered oranges is dark chocolate. Use plain chocolate with a high cocoa percentage or dark chocolate infused with intense orange flavor. The Lindt brand is delicious.
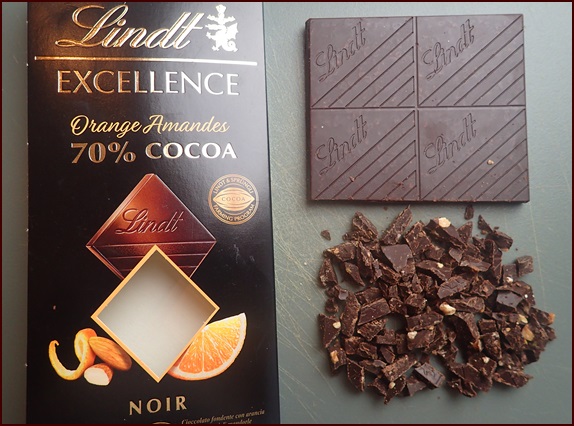
Photo: Lindt chocolate comes in bars which you chop into smaller pieces.
You can melt chocolate in a microwave using a microwave-safe container (30% power in 30 second intervals), but another effective way to melt chocolate is the double-boiler method.
Add an inch of water to a saucepan. Place a heat-safe bowl inside the saucepan. Use a bowl that is slightly smaller than the pan with its top resting on the top rim of the pan. To reduce direct heat transfer, put a couple of spoons in the pan to elevate the bowl off the bottom of the pan. You want to melt the chocolate, not cook it.
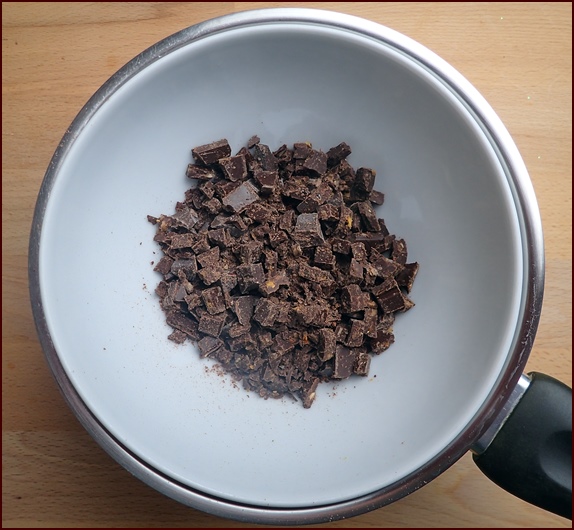
Cut the chocolate into smaller pieces and place it inside the bowl. Turn the heat up to about medium. It’s not necessary to heat the water all the way to a boil.
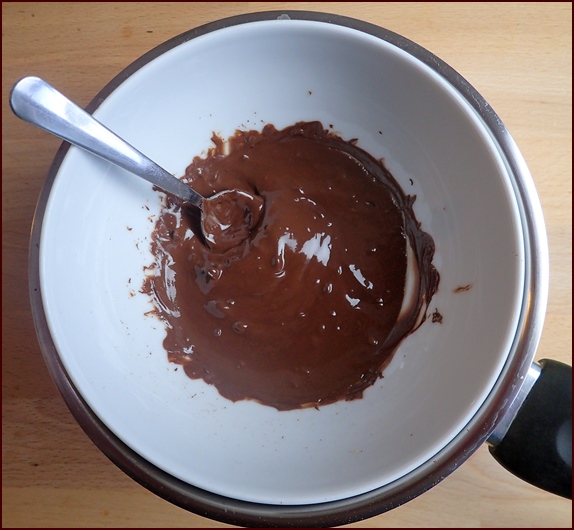
Stir the chocolate while it melts until it has a smooth viscosity. Considering the presence of steam and hot water, adult supervision is necessary if doing this activity with children.
How to Dip, Top & Cover Oranges in Chocolate
Now you’re ready for the marriage ceremony of chocolate with oranges—a match made in heaven.
Dipping
Dipping is the most common method for making chocolate dipped oranges. Just dip away and place the dipped oranges on a tray covered with parchment paper. Once you have a full tray, place the tray in the refrigerator. The chocolate will harden in 10–15 minutes.
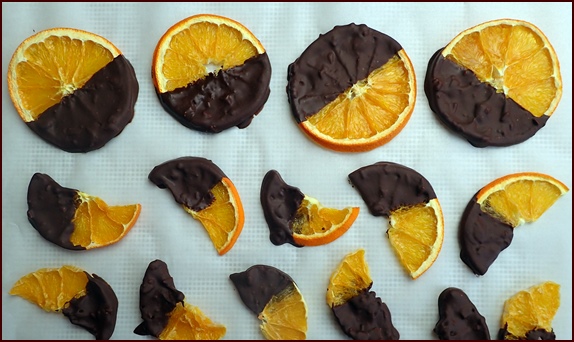
The drawback of the dipping method is that you have to maintain a sufficient depth of chocolate in the bowl. That means you may have to melt more chocolate than you need.
No worries, if the depth of the chocolate gets too low for dipping, simply mop up the remaining chocolate with smaller orange slices. Drop them in one-at-a-time, stir them around with a spoon until completely covered in chocolate.
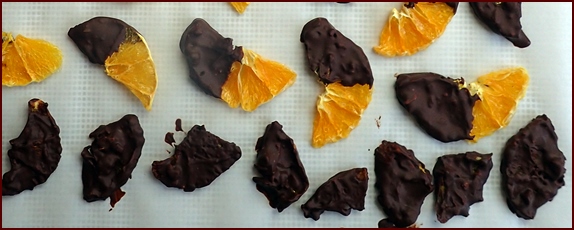
Photo: Note the bottom row of chocolate covered orange slices that were coated after the chocolate in the bowl was too shallow for dipping.
Topping
Topping oranges with chocolate allows you to melt just enough chocolate to finish the job. Plus, they look nice and pack nicely since the chocolate is only on one side.
Place dried orange slices on a tray covered with parchment paper or a nonstick sheet.
Apply melted chocolate to each slice using a teaspoon. Spread the chocolate to the edges of the rind.
If you really want to go wild, sprinkle chopped nuts or coconut flakes on some of them.
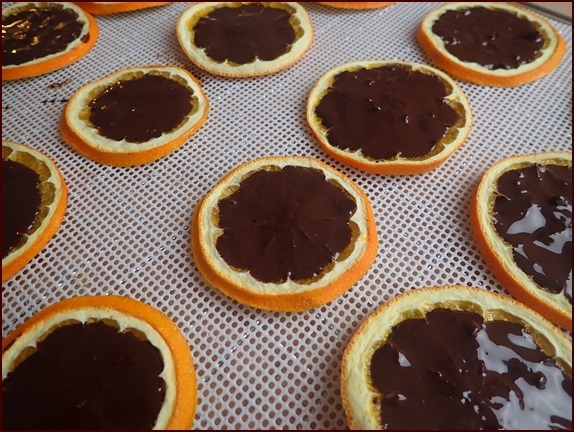
Photo: Orange slices topped with chocolate.
When you’re done coating the oranges, slide the tray into the refrigerator for 10-15 minutes.
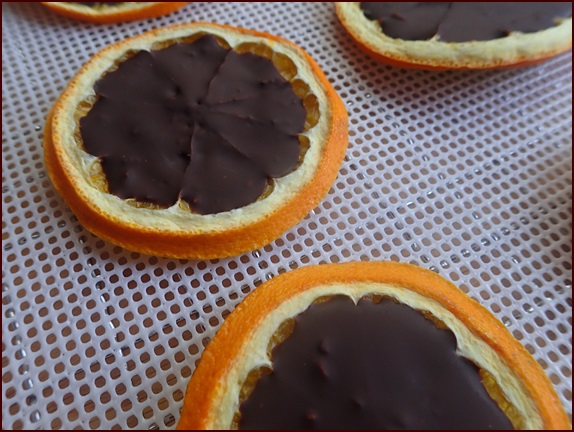
Photo: Chocolate topped oranges after the chocolate hardened.
Covering
These chocolate covered oranges are truly amazing. They are similar to chocolate covered raisins, but with sweet orange flavor inside.
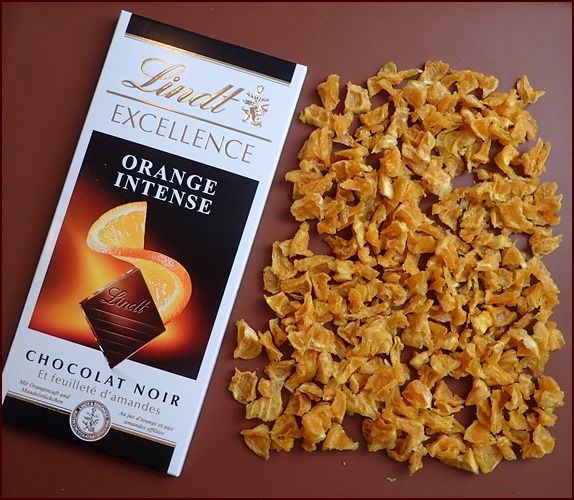
Start with the sweetened and dried orange pieces previously described.
Melt the chocolate. Lindt “Orange Intense” chocolate is ideal for this project.
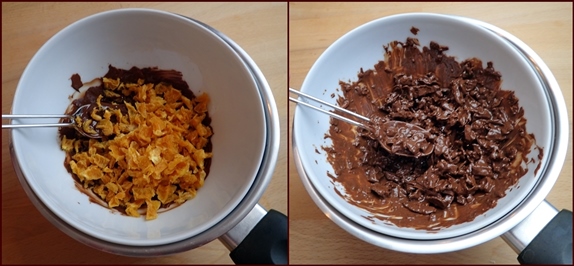
Once the chocolate is melted, drop in the dried orange pieces and stir with a teaspoon until they are fully coated.
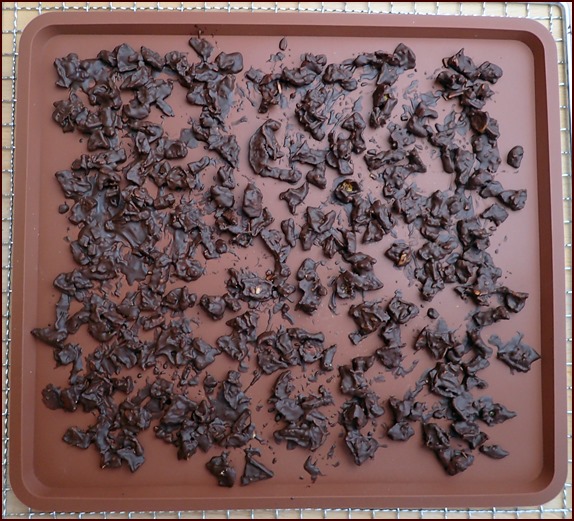
Photo: Chocolate covered orange pieces on silicone tray.
Transfer coated orange pieces to a nonstick tray, nonstick sheet, or tray covered with parchment paper.
Place tray in refrigerator to harden chocolate.
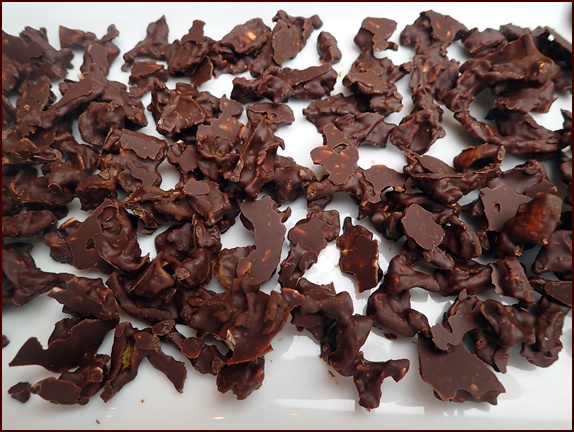
Photo: Chocolate covered orange pieces. You must try these!
Packaging & Storing Chocolate Covered Oranges
Once the chocolate hardens on the oranges in the refrigerator, your masterpieces can be transferred from the trays to containers with lids or Ziploc bags. I store these in the refrigerator because they are especially delicious cold, but also to keep the chocolate hard.
Chocolate covered oranges are not so good for summer hikes, since they will melt in hot weather, but they hold up well indoors at room temperature.
For gifting, they look beautiful in a Christmas-themed tin. Separate layers with parchment paper. As mentioned previously, a gift idea for families is to pack some chocolate covered oranges along with uncovered orange slices and a couple of dark chocolate bars. Then the family on the receiving end can enjoy the fun of dipping or topping the oranges.
Nonstick Sheets Used on this Page to Make Chocolate Covered Oranges

Left: Cosori Dehydrator, Stainless Steel, 6-Trays
Middle: Dostk Silicone Mesh Dehydrator Sheets, 14” x 14”, 12-Pack
Right: Hlimior Silicone Dehydrator Trays with Raised Edges, 12” x 10.6”, 6-Pack
As an
Amazon Associate, Backpacking Chef earns from qualifying purchases. Thank you!
Explore More...
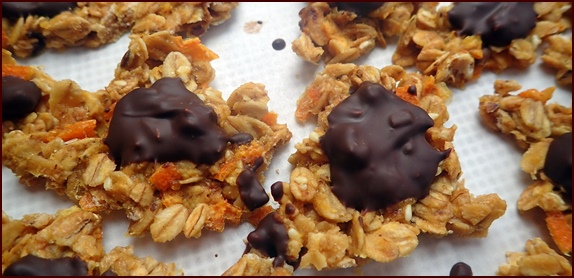
Homemade granola turned into clusters with blended oranges and sweetened orange peels, then topped with chocolate. Oh my!
Chocolate Covered Orange Granola Clusters
See also:
Share this page with friends on social media.
Free E-book & Newsletter
Free with Trail Bytes subscription.
Dehydrating Food from A–Z

