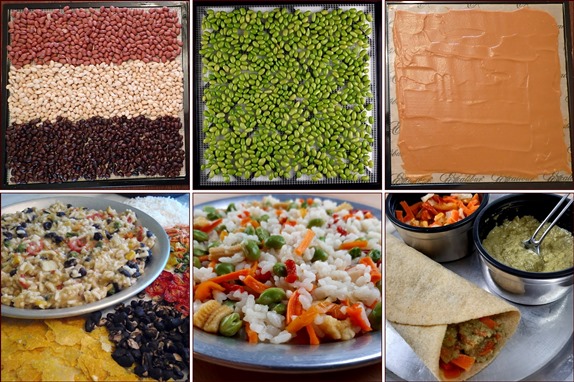
Dehydrating Beans & Bean Bark
This page covers dehydrating beans, both home-cooked and canned, plus how to dehydrate beans after running them through a blender to make bean bark. Bean bark rehydrates into a tasty sauce in backpacking meals.
Dehydrating beans from scratch, after soaking and cooking them, results in good-looking beans with fewer beans splitting open during dehydration. They are chewier after rehydrating them in backpacking meals. Canned beans, on the other hand, will almost all split open during dehydration. While not as pretty as home-cooked beans, they rehydrate quickly, and you save all the soaking and cooking time—all you have to do is rinse the beans and spread them out on the dehydrator trays.
Dehydrating beans is an inexpensive and healthy alternative to using dehydrated meat in meals. Although not considered “complete proteins,” beans achieve full-protein status when paired with rice, corn, or pasta in meals. One bean that does qualify as a complete protein is the edamame bean, which is a soy bean that is harvested before full maturity. It has a beautiful green color and many health benefits.
Read on to learn about dehydrating beans and bean bark, and how to use dried beans and bean bark in recipes.
Dehydrating Beans Table of Contents:
Dehydrating Canned Beans
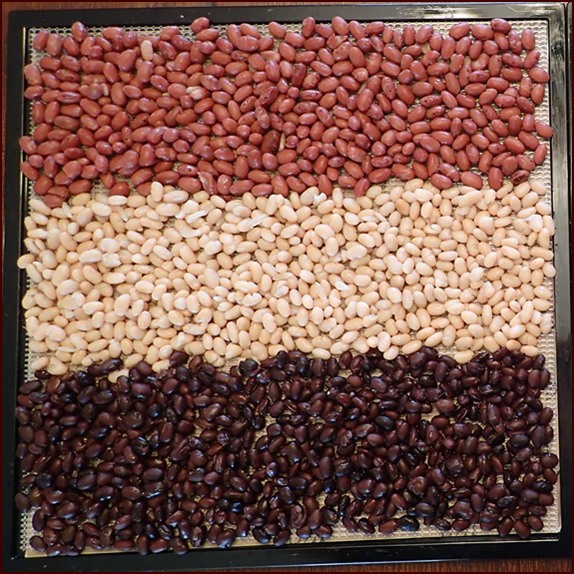
Photo: Beans from 3 16-oz. cans spread on mesh sheet of Excalibur dehydrator tray.
Dehydrate black-eyed peas and chickpeas the same way as beans.
Drain and rinse beans. Arrange beans in a single layer on mesh sheet with a nonstick sheet under the mesh sheet. Canned beans split open while drying, so the nonstick sheet will catch any bits of dried beans that fall through the mesh.
Temperature for dehydrating beans: 125°F (52°C) for 6–8 hours.
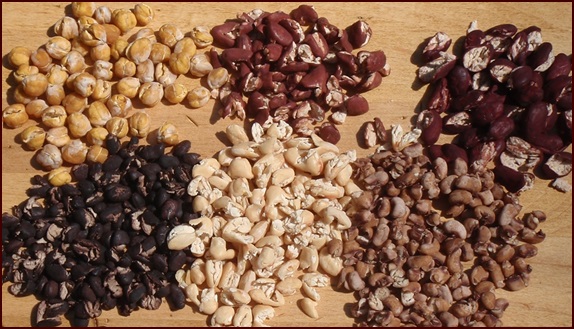
Photo: Dehydrated beans, chickpeas, and black-eyed peas from cans, most of them split open.
Dried Yields of Canned Beans (16-oz cans):
- White beans: ¾ cup (72 g)
- Red beans: 1 cup (85 g)
- Black beans: 1 cup (89 g)
Pressure-Cooking
& Dehydrating Beans
Pressure-cooking beans results in attractive dried beans, with far fewer splitting open during dehydration, and they rehydrate well. Plan ahead—you need to soak the beans the day before you pressure-cook and dry them.
Soaking
Beans
Soaking beans makes them more digestible and less likely to cause gas.
Use 5 times as much water as beans. Combine dry beans with unsalted water in a pot, and bring to a boil for 3 minutes. Remove the pot from heat and let sit with lid on pot. After 5 hours, rinse beans, cover with fresh water, and refrigerate for several hours or overnight.
Pressure-Cooking
Beans
Pour off the soaking water, and put the beans in the pressure cooker with enough fresh water to cover. Flavor enhancers, such as a bay leaf, garlic, onion, or bouillon, may be added if desired. Pressure-cook on high setting (15 psi) for 10 minutes, followed by the quick-release method to let out the pressure. Allow beans to cool.
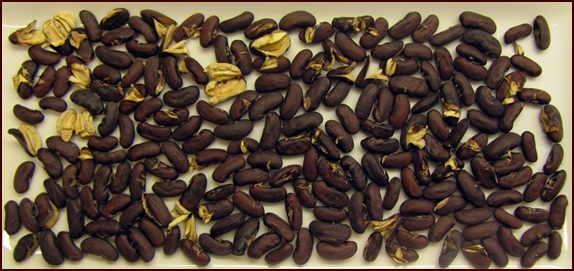
Photo: Pressure-cooked beans after drying. Fewer beans split open compared to dehydrated canned beans.
Dehydrating
Beans after Pressure-Cooking
Dehydrate beans on mesh sheets without nonstick sheets at 125°F (52°C) for 6–8 hours or until no moisture remains when you open up a few beans. You can still expect 25% of the beans to split open, but that is far fewer than when you dehydrate beans from cans.
Slow-Cooking
Beans
Another method of cooking beans, which skips the pre-soak, is to use a slow cooker.
Add rinsed beans to a slow cooker with enough water to cover the beans plus 2 inches.
Use 2 teaspoons of salt per pound of beans, and add aromatic ingredients like bouillon, onions, garlic or bay leaves.
Cook the beans on low setting until tender, from 3–6 hours depending on the size of the beans.
Discard the cooking water and dehydrate beans at 125°F (52°C) for 6–8 hours.
For more information about methods of cooking beans, visit The Bean Institute.
Recipes
with Dehydrated Beans
Macaroni with Beans & Spinach in Tomato
Sauce
This recipe is from the Action Guide: Dehydrating 31 Meals.
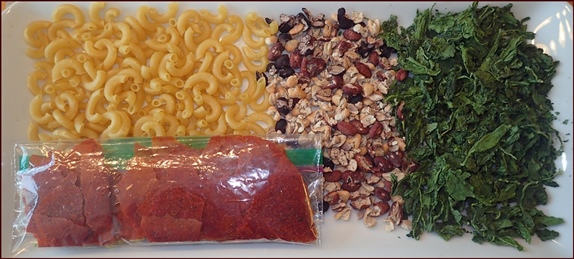
Photo: Dehydrated canned beans were used in this recipe. Note that most of them split open while drying.
Servings: 1 large
Ingredients:
- ¾ cup precooked and dried macaroni (70 g)
- ⅓ cup dried beans (25 g)
- ⅓ cup dried spinach (7 g)
- ⅓ cup tomato sauce leather (25 g)
- 1¾ cup water to rehydrate (414 ml)
On the Trail:
Combine ingredients with water and soak for 5 minutes. Bring to a boil for 1 minute. Transfer pot to an insulating pot cozy and wait about 15 minutes before serving. This meal also rehydrates well in a thermos food jar.
Rice with Beans & Vegetables
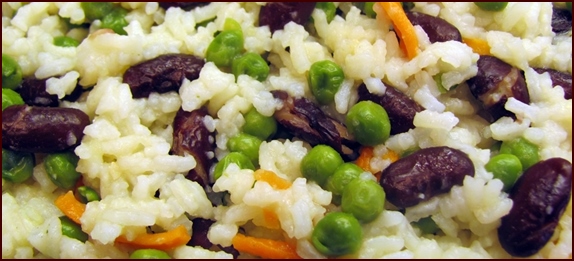
Photo:
Dehydrated pressure-cooked beans were used in this simple and tasty
backpacking meal. Notice that most of the beans did not split open.
Servings: 1 Large
Ingredients:
- ¾ cup dried rice
(precooked in vegetable or chicken broth (100 g) See Dehydrating Rice.
- ⅓ cup dried beans (25 g)
- ⅓ cup dried mixed vegetables, such as a combination of peas and carrots (25 g)
- Salt and pepper to taste
- 1¾ cups water to rehydrate (414 ml)
Easy Cheesy Option: 2 Tbsp. cheese powder plus 1½ Tbsp. milk powder. Increase water by ½ cup. For cooking in pot, stir in cheese and milk powders after removing pot from stove.
On the Trail:
Pot Cooking: Soak ingredient for 5 minutes, then bring to a boil for 1 minute. Transfer pot to an insulating cozy for 15 minutes.
Thermos Cooking: Use ¼–½ cup more water if making the meal in the morning to eat for lunch. Add boiled water to ingredients in thermos. Wait at least 20 minutes, up to several hours.
Vegetarian Corn Bark
Stew
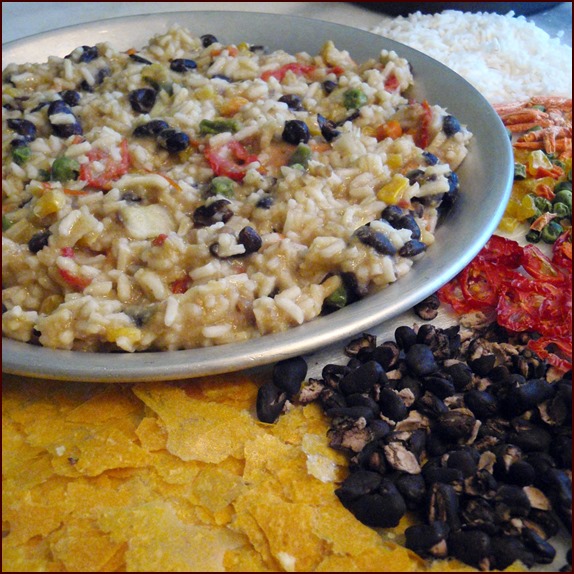
Photo: Vegetarian Corn Bark Stew features dehydrated black beans and creamed corn bark.
Dehydrated black beans make a complete protein when combined with rice or corn. Vegetarian Corn Bark Stew includes both. Get the recipe here: Vegetarian Corn Bark Stew.
There are endless
possibilities for creating backpacking meals when you start dehydrating beans. Discover
many more bean recipes on the main Backpacking Recipes Page.
How
to Dehydrate Beans into Bark
Bean bark lets you create flavorful and saucy backpacking meals using any kinds of beans plus extra flavors such as BBQ sauce, salsa and enchilada sauce. It rehydrates well with hot water.
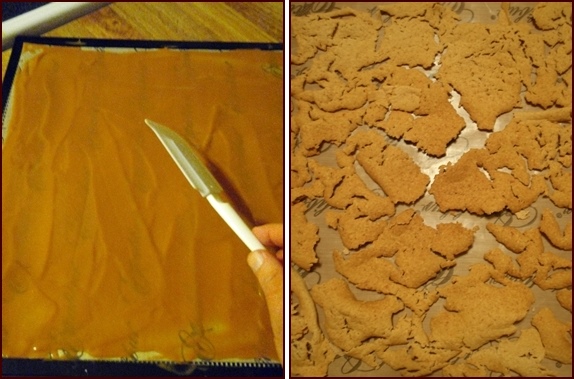
Photo: Vegetarian baked beans run through a blender, spread thinly on dehydrator tray, and dried to a crumbly texture. Recipe for a delicious bean bark backpacking meal below.
Run a can of vegetarian baked beans or an equivalent quantity of homemade beans through a blender until smooth. Use all the liquids from the can. Avoid using baked bean products containing bacon or pork because fatty meats will not dehydrate well and may spoil.
Dehydrating
Bean Bark
Pour blended beans on dehydrator trays covered with nonstick sheets, such as Excalibur Paraflexx® sheets. Spread thinly with a spatula. A 28-oz. can of blended baked beans takes up 3 Excalibur dehydrator trays.
Dehydrate at 135°F (57°C) for approximately 8 hours. Unlike potato bark, which dries into a sheet, bean bark dries like mud… full of cracks.
After about 6 hours or when the bark is dry enough to pull off the trays, flip it over to expose the moister bottom side to the hot air.
Dried Yields:
- A 16-oz. can of blended baked beans yields 1 cup of bark weighing 112 grams.
- A 28-oz. can of blended baked beans yields 3 cups of bark weighing 200 grams.
Baked Bean Bark Stew
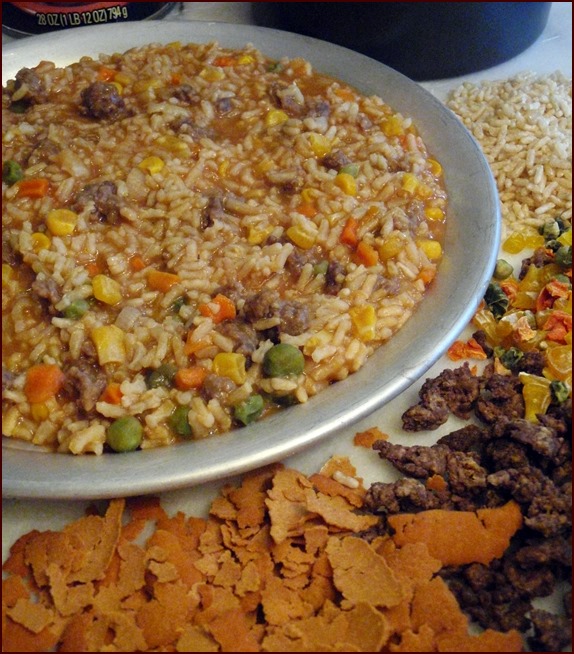
Servings: 1
Ingredients:
- ½ cup instant or precooked and dried rice
- ¼ cup dried mixed vegetables (carrots, corn, peas, and green beans)
- ¼ cup dried ground beef*
- ¼ cup bean bark
- 1¼ cups water to rehydrate
* Ground turkey, chicken, or ham, may be substituted for ground beef to add variety to meals. See Dehydrating Meat.
Large Serving:
The recipe above provides 432 calories. To make a larger serving with 602 calories, use ¾ cup rice, ⅓ cup vegetables, ⅓ cup ground beef, ⅓ cup bean bark, and 1¾ cups water to rehydrate.
At Home:
Pack all dry ingredients in a plastic zip style bag.
On the Trail:
Combine all ingredients with water in pot and soak for 5 minutes. Light stove, bring to a boil and cook for 1 more minute. Transfer pot to an insulating cozy for 10–15 minutes.
Stir briskly before eating and the bark will dissolve into tasty gravy.
Serving Variation:
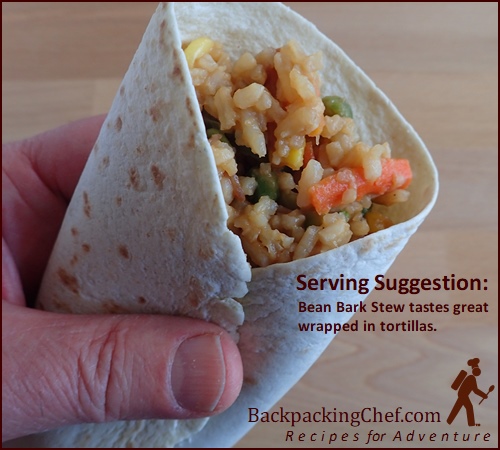
Roll all this tasty goodness up in a couple of tortillas. Messy, but very good.
You'll find more bean bark recipes in Recipes for Adventure: Healthy, Hearty & Homemade Backpacking Recipes, such as Black Bean & Salsa Bark and Enchilada Bean Bark. All list regular and large serving sizes to match your appetite.
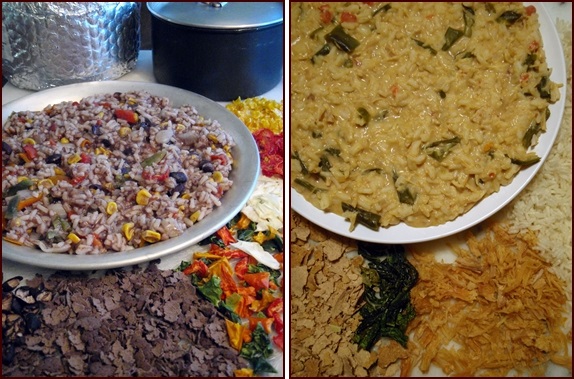
Photos: (L) Black Bean & Salsa Bark Stew, (R) Enchilada Bean Bark Stew (It tastes a lot better than it looks in the photo).
Dehydrating
Edamame Beans
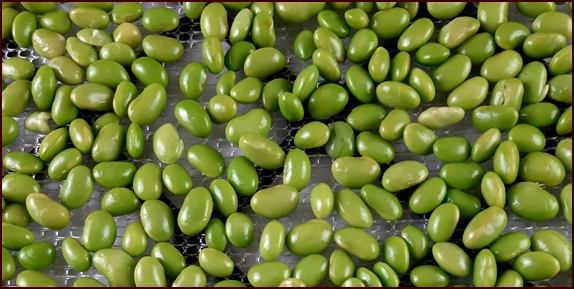
With their beautiful green color and complete-protein status, edamame beans are a welcome addition to backpacking meals. Not only are they high in protein, they are also packed with fiber, folate, iron, and calcium. See: Edamame Nutrition, Medical News Today.
Dehydrated edamame beans are chewier than other beans when rehydrated in meals. Their firm texture makes them an ideal plant-based food to use in place of meat.
Look for edamame beans in the frozen-foods department. The pods are not edible, so buy only shelled beans for dehydrating. Edamame beans are steamed at the factory before being frozen. Nevertheless, they dehydrate and rehydrate better when cooked a little more prior to dehydration.
Cooking
Edamame Beans
Place frozen beans in a pot with just enough water to cover. Bring to a boil, then reduce heat and continue cooking at a light simmer for 4 minutes.
After 4 minutes, strain and transfer beans to a bowl of ice water for 4 minutes to cool. This blanching process helps to check the skin of many of the beans, conditioning them better for drying.
Dehydrating
Edamame Beans
Place beans directly on mesh sheet of dehydrator tray in a single layer.
Dehydrate beans at 125°F (52°C) for approximately 12 hours. Because edamame beans don’t split open like canned beans during dehydration, they take longer to dry. Check for moisture in the beans by breaking a few in half. Dried edamame beans will be hard.
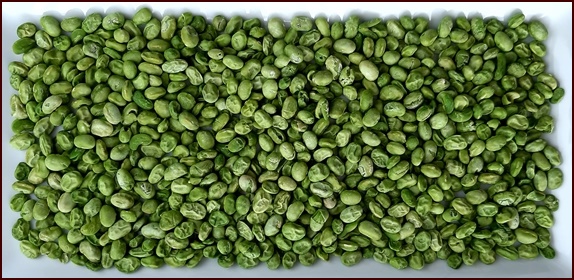
Photo: Dehydrated edamame beans.
Dried Yield: A 500 gram bag of frozen edamame beans (3 cups), will weigh approximately 150 grams after dehydration with a volume of 1¼ cups.
Recipes with Edamame Beans
Sushi
Rice with Edamame Beans & Vegetables
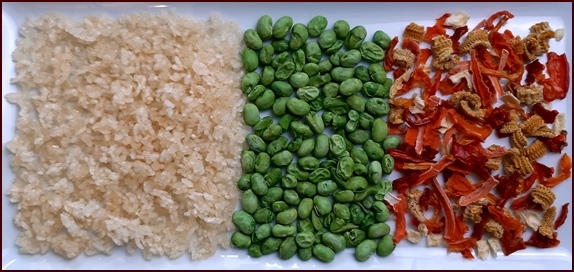
Servings: 1
Ingredients:
- ½ cup dried sushi rice* (60 g)
- ¼ cup dried edamame beans (25 g)
- ¼ cup dried mixed vegetables (15 g)
- 1 cup water to rehydrate (237 ml)
* See the Dehydrating Rice Page for instructions on how to dehydrate sushi rice, as well as other ways to dry rice that would taste good in this recipe.
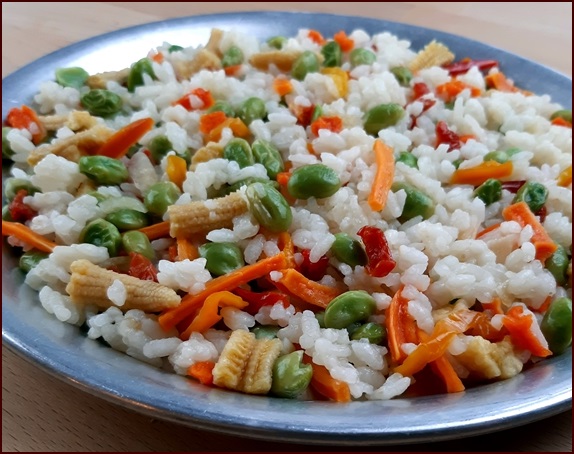
Photo: Rehydrated Sushi Rice with Edamame Beans & Vegetables.
On the Trail:
Stove Preparation: Place ingredients and water in pot and soak 5 minutes. Bring to a boil for 1 minute, then transfer pot to an insulating cozy. Wait 15–20 minutes before serving.
Cold-Soak Preparation: Combine ingredients with cold water in a container with a tight-fitting lid. Wait at least 2 hours before serving. Beans will be very chewy using the cold-soak method.
Edamame
Hummus Recipe
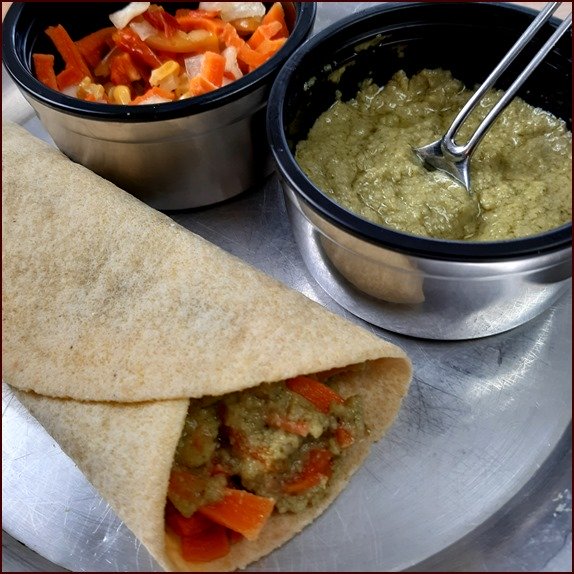
Edamame beans can be blended with traditional hummus ingredients—chickpeas, lemon juice, garlic, and basil—then dried and ground into powder. Hummus powder rehydrates instantly with cold water. Than all you have to do is add olive oil.
You’ll find the recipe on our No-Cook Backpacking Recipes page:
Also, don't miss the page about making and dehydrating authentic, homemade hummus.
Dehydrating Chickpeas & Hummus.
Explore More...
Dehydrating Food Guide Table of Contents
Backpacking Recipes Table of Contents
Recipes for Adventure Books
Share this page with friends on social media.
Free E-book & Newsletter
Free with Trail Bytes subscription.
Dehydrating Food from A–Z

